 ROBOT REPAIR
SYMPTOM + TREATMENT FIELD GUIDE
Welcome to the Robot Repair Field Guide.
Below you will find a selection of guides for diagnosing and fixing any issues with your Buildini™ 3D Printer.
If you run into an issue that is not addressed in this guide or have questions please contact our Robot Repair Team at hello@budmen.com
Hitting Emergency Stop
Something has gone wrong with a print and you need to stop it immediately.
HOW TO RESTART:
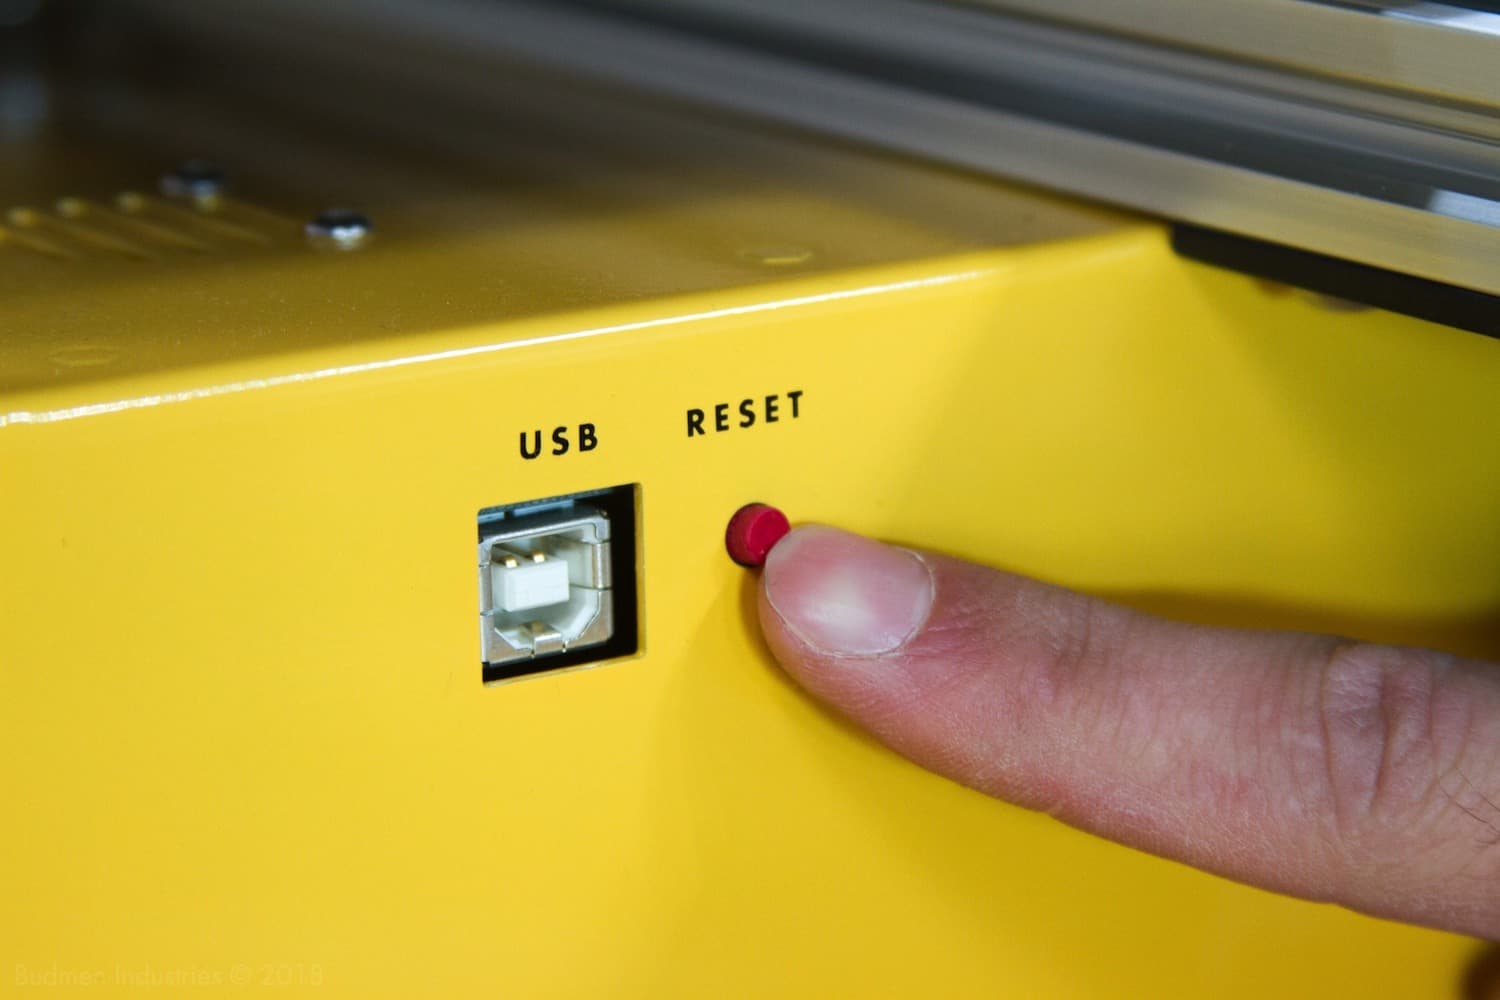
- Press the reset button.
- The reset button is located on the left side of your Buildini™. Pressing the reset button equates to shutting off the power. It is useful only when the Buildini™ needs immediate cancellation.
Overuse of the reset button will improperly shut off the Printer and cause issues with the circuit board inside. The correct way of shutting off the Buildini™ is to bring the temperature of the nozzle to at least 35°C and then shut off the Printer using the power switch.
Plastic Wont Extrude
You selected print, the printer heats up and homes, but plastic does not comes out.
See next few sections for a step-by-step guide on how to fix these possible causes.
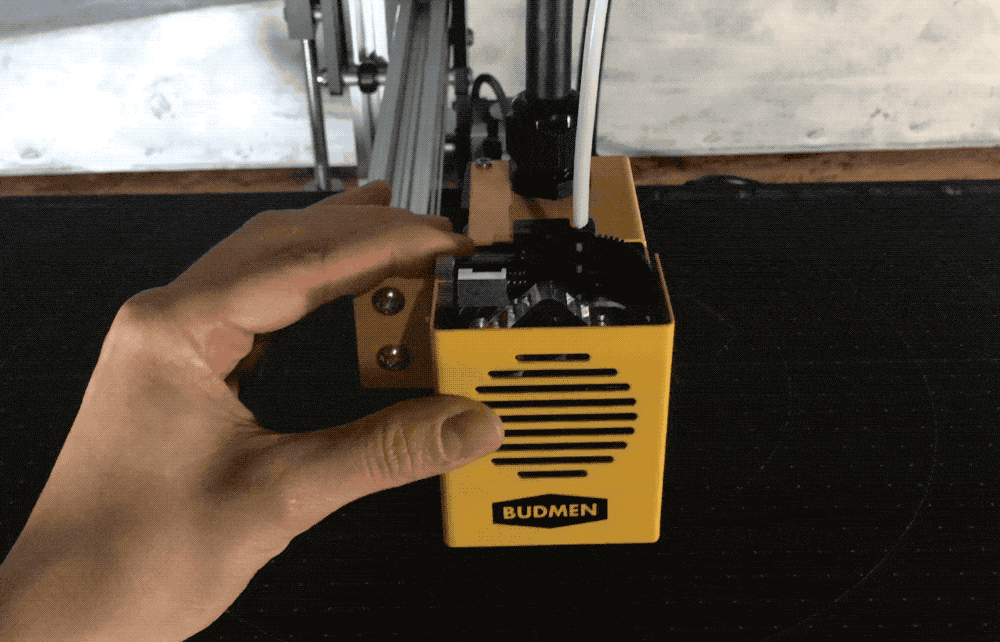
Nozzle Too Close to Build Platform
HOW TO DIAGNOSE:
- During the first layer of the print, is the extruder nozzle too close to the build platform?
- Does the extruder start clicking when it should be extruding?
- Does the nozzle extrude plastic, but there is also an excess amount of plastic being pushed around?
If you answered yes to either of the above, chances are the nozzle is too close to the build platform.
Solution?
- Lower the build platform by tightening the leveling knobs.
- Run a test print to re-check first layer height.
- If needed, re-level the build platform.
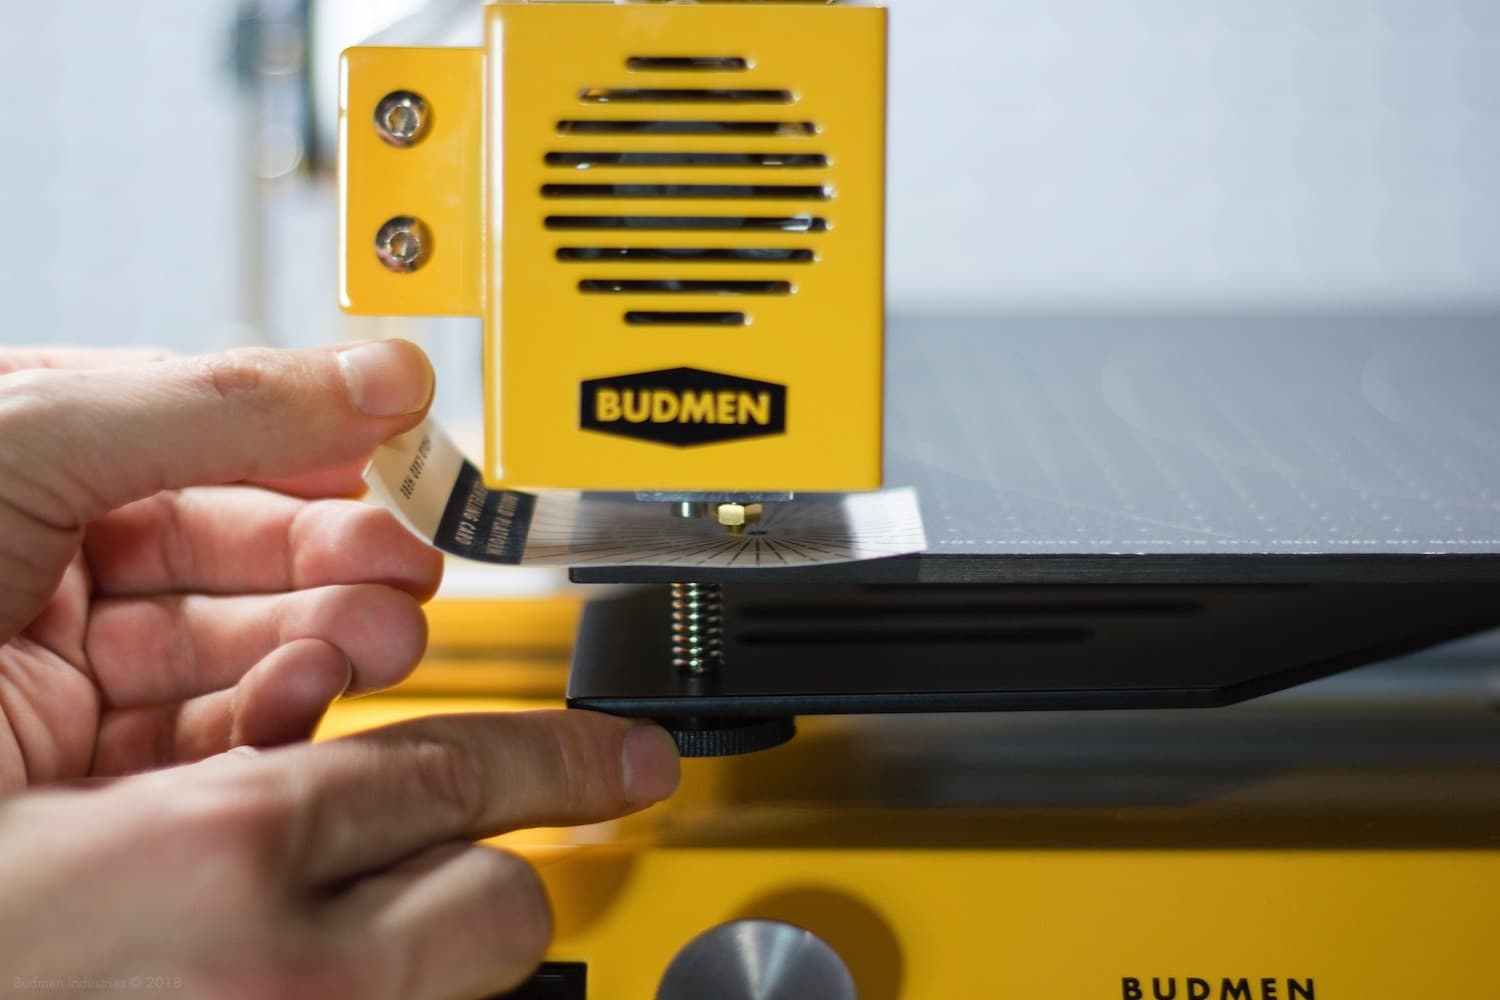 Re-leveling the build platform because nozzle is too close
Clogged Nozzle
HOW TO DIAGNOSE:
- Preheat the Printer to the correct print temperature for your selected filament.
- Once at temperature, manually feed filament into the extruder by spinning the drive gear in an upwards motion.
- Is there plastic extruding from the nozzle?
If no, chances are you have a clogged nozzle. - Does the gear spin with a lot of resistance or is the gear not spinning at all?
If yes, chances are you have a clogged nozzle.
Solution:
- Increase the temperature by 5°C to 10°C above the recommended print temperature and try manually feeding filament into the extruder. Never exceed a temperature above 245°C on the Buildini™. If you are unable to feed filament through the extruder, or if your recommended print temperature exceeds 245°C, proceed to the next step.
- Heat the nozzle to 240°C. Remove the old filament.
- Slowly push the Clog Cleaner filament through the nozzle until you do not see any of the previous filament coming out of the extruder.
- Lower the nozzle temperature to 90°C to solidify the filament within the nozzle.
- Brace the extruder. Do not touch the nozzle at any time. With your other hand, gently pull up on the Clog Cleaner until it comes out of the top of extruder, pulling the clogged material with it.
- Cut away the dirty part of the Clog Cleaner with your Snippers. Depending on how badly the nozzle is clogged, this process may take several attempts. Repeat this process until the Clog Cleaner filament comes out clean.
Tension Dial Too Low
HOW TO DIAGNOSE:
- Preheat the printer to the correct print temperature for your selected filament.
- Without pinching the load lever, try inserting filament. Does the filament easily insert into the extruder without pinching the lever?
If yes, chances are there is not enough tension on the load lever.
Solution:
- Turn the tension dial on the left side of the extruder.
- Try reinserting the filament. It should only insert when the load lever is pinched.
- If it is still under-extruding during the print, increase the tension on the dial until it extrudes plastic smoothly.
Incorrect Temperature
HOW TO DIAGNOSE:
- Check the filament print settings for your filament on the manufacturer specification sheet or refer to the Material Settings Chart.
- Select your print job and click print. Watch to see what temperature it heats up to.
- Does the temperature set in the print job match the recommended print temperature for your filament?
If not, the temperature isn’t not correct.
Solution:
- Open your 3D model file in your slicer.
- Set the temperature setting to the proper print temperature for your filament.
- Reslice, save the G-Code file to your SD card, and try printing again.
Tangled Filament
HOW TO DIAGNOSE:
- Look to see if there is any sharp bends or knots in the filament where it enters the Teflon guide tube. If there are no bends or knots proceed to the next step.
- Manually unspool some filament while keeping an eye on the spooled filament.
- Is there any overlapping filament or other signs that it might be tangled?
- Does the filament tug or stop when you try to unspool it?
If yes, the filament is tangled.
Solution:
- Very carefully untangle the problem area or fix any filament overlaps on the spool.
- Re-spool the filament, being careful not to let it overlap or tangle again.
- Re-load the filament and try printing.
Filament Loaded Incorrectly
HOW TO DIAGNOSE:
- Preheat the Printer to the correct print temperature for your selected filament.
- Pinch the loading lever and pull the filament out of the printer.
- Inspect the end of the filament.
- Does the filament have a clean end?
- Are there bends in it or a chunk missing?
If yes, the filament was not loaded correctly.
Solution:
- Clip the end of the filament with the snippers so you have a clean tip to insert into the extruder.
- Carefully feed the filament into the extruder until you see plastic come out of the nozzle.
Filament Swelled
HOW TO DIAGNOSE:
- Preheat the Printer to the correct print temperature for your selected filament.
- Pinch the loading lever and pull the filament out of the printer.
- Inspect the end of the filament. Is it the same width as the rest of the unused filament? If not, is it wider?
If it is wider, the filament has swelled because of moisture. Do not use this filament.

Solution:
- Clip a new end of filament with the snippers so you have a clean tip to insert into the extruder.
- Carefully feed the filament into the extruder until you see plastic come out of the nozzle.
Extruder Clicking
Your print job started and there is an audible clicking sound coming from the extruder as it tries to expel plastic.
Solution:
- The nozzle may be too close to the build platform. Stop your print, level the build platform and try printing again.
- There may be too much pressure on the loading lever. Loosen the tension adjustment dial on the left side of the extruder.
- Run a test print to see if the printer is still clicking and make sure the plastic is extruding evenly.
Print Will Not Stick
You started a print job but plastic does adhere properly to the build platform.
Build Platform Is Not Level
HOW TO DIAGNOSE:
- Start a print and carefully observe the first layer.
- Does the plastic curl up immediately?
- Does the plastic barely touch the build platform?
- Is there a noticeable gap between the build platform and the nozzle?
If yes, chances are the build platform is not level.
Solution:
Level the build platform, refer to online leveling instructions or the Reference Section of the User Manual.
Build Platform Is Not Clean
HOW TO DIAGNOSE:
- Are there leftover pieces of plastic from old prints on the build platform?
- Are there other deposits or greasy fingerprints on the surface that should not be?
If yes, the surface needs to be clean.
Solution:
- Scrape any excess plastic off the build platform with your print removal spatula.
- Dab a small amount of Isopropyl Rubbing Alcohol (use 50% mixture, available at any convenience store) on a clean paper towel. Gently rub the surface to clean any debris or grease.
- If either did not clean the surface, it may be time to replace the Perfect Print Platform from our online store.
Incorrect Temperature
- Check the filament print settings for your filament on the manufacturer specification sheet or refer to the Material Settings Chart.
- Select your print job and click print.
- Does the temperature set in the print job match the recommended print temperature for your filament?
If not, the temperature is not correct.
Solution:
- Open your 3D model file in your slicer.
- Set the temperature setting to the proper print temperature for your filament.
- Re-slice, save the G-code file to your SD card, and try printing again.
Material Incompatible With Build Platform
HOW TO DIAGNOSE:
- Check to ensure build platform is level and clean.
- Set the Printer to the correct temperature for the filament you are using.
- Run a print.
- Is the print still not sticking to the build platform?
- If you switch to printing with PLA filament, does the print stick to the build platform?
If the PLA sticks and not the other filament, you may have a incompatible plastic.
Solution:
Change to a filament that is compatible, re-slice your object with settings for the compatible material, and re-print.
Y-Axis Wheels Shredding
After running a few prints you notice the Y axis wheels are shedding little black fibers of plastic.
Solution:
Wipe away the fibers and don't worry! The slight shedding on the wheels is normal, the system was designed with an extra tight preload on the Y axis and to have a slight break-in period. The wheels should stop shedding when the break in period is over after a couple dozen hours of printing.
Stringing on 3D Prints
There are unsightly and unwanted strings covering your finished 3D printed object.
Solution:
- Lower the print temperature 5°C to 10°C.
- Slow down the print speed.
Higher temperatures make the material more fluid and more likely to ooze. A lower temperature makes the material less fluid and less likely to string.
Note: Since you lowered the temperature, the filament is going to extrude more slowly. To compensate for the adjustment, reduce the speed of the print. You can adjust these settings in the slicer software and then re-slice your 3D model. Or you can adjust these settings using the Control menu on the LCD screen as it prints by adjusting the Speed and Temperature settings.
Edges of 3D Print are Warping
The corners of the print are lifting and/or whole sections of the object are slowly curling up and away from the build platform.
Plastics expand slightly when printed but also contract as they cool down. If the plastic contracts too much, this can cause the print to curl up from the build platform.
Solution:
- Make sure the build platform is leveled correctly.
- Within your slicing software, include a raft below your print. This discarded latticework of filament underneath an object helps with warping and bed adhesion.
Print Is Drooping or Sagging
You started your print and some of the features of your object are sagging or drooping.
These are unsupported features that need material beneath them to act against the force of gravity. Using breakaway support material will help these features print.
Solution:
- Within your slicing software, include support material. Reprint your object.
- Redesign the object to have an angle greater than 45°, therefore ensuring that material will not overhang and print properly.
Printer Will Not Read SD Card
You inserted the SD card into the SD slot and the printer does not register the SD card or it gives you an SD CARD READ ERROR.
Solution:
- Make sure that the file name on the SD card does not contain special characters.
- Double check that you exported a G-code file onto the SD card, not an STL file.
- Try taking the SD card out of the slot and reinserting it into the Buildini™.
Printer Not Moving Correctly
You started your print or tried to home the Printer and the X or Y-Axis did not move or only moved part of the way.
HOW TO DIAGNOSE:
Check if the X and Y- axis motors are plugged in and check if both belts are properly tightened. Unplugged motors or loose belts would cause a printer to malfunction and prevent proper printing.
Belt is Loose
If the X belt is loose:
- Slide the build platform all the way to the right. Slightly loosen the four screws on the X motor with your T10 Torx Allen Key.
- Gently push the motor to the left to tension the belt. While holding the motor, tighten the screws.
If Y belt is loose:
- Take the excess belt out from the back of the Y-Axis. Using the T10 Torx Allen Key, loosen the set screw located at the back of the extrusion in the slot on the bottom side.
- With the set screw loosened gently tug the excess belt to tension it. Tighten the set screw while keeping tension on the belt.
Motor Is Unplugged
- Check to make sure the motor under the left X-Axis wing is plugged in. If it is unplugged even partially, click it back in.
- Check to make sure the motor on the right side of the Y-Axis carriage is plugged in. If it is unplugged even partially, click it back in.