Welcome to the Buildini™ Set Up Guide. If you have unboxed your Printer and are ready to start your 3D printing adventure, then you have come to the right place.
Follow the steps below to 3D print your first object on your Budmen Buildini™. If have questions please contact our support team.
Step 1:
PLACE ON SECURE SURFACE
In a dry environment, place the Printer on a secure surface, where it cannot fall or tip over. Make sure the Printer is a minimum distance of two feet (24 inches) from other objects.
Step 2:
ATTACH SPOOL HOLDER
Inside your Robot Repair Bag, you will find the spool holder attachment and two M3 x 12mm screws.
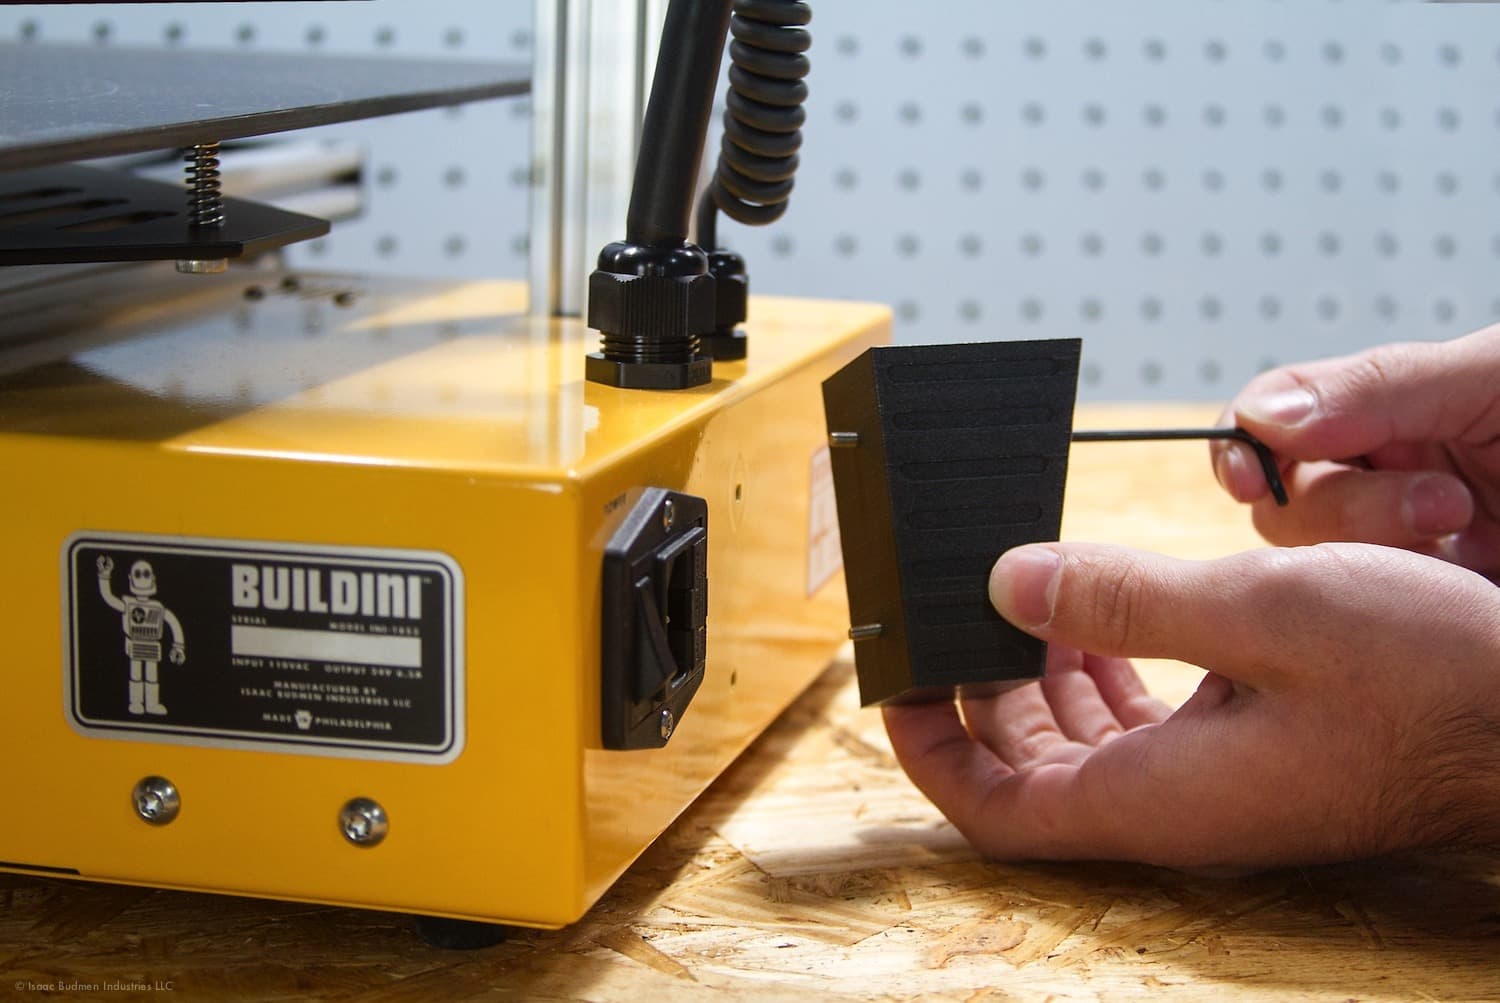
Securely fasten the attachment to the back of the Printer using the two screws provided and your T10 Allen Key.
Insert the spool holder arm fully into the attachment.
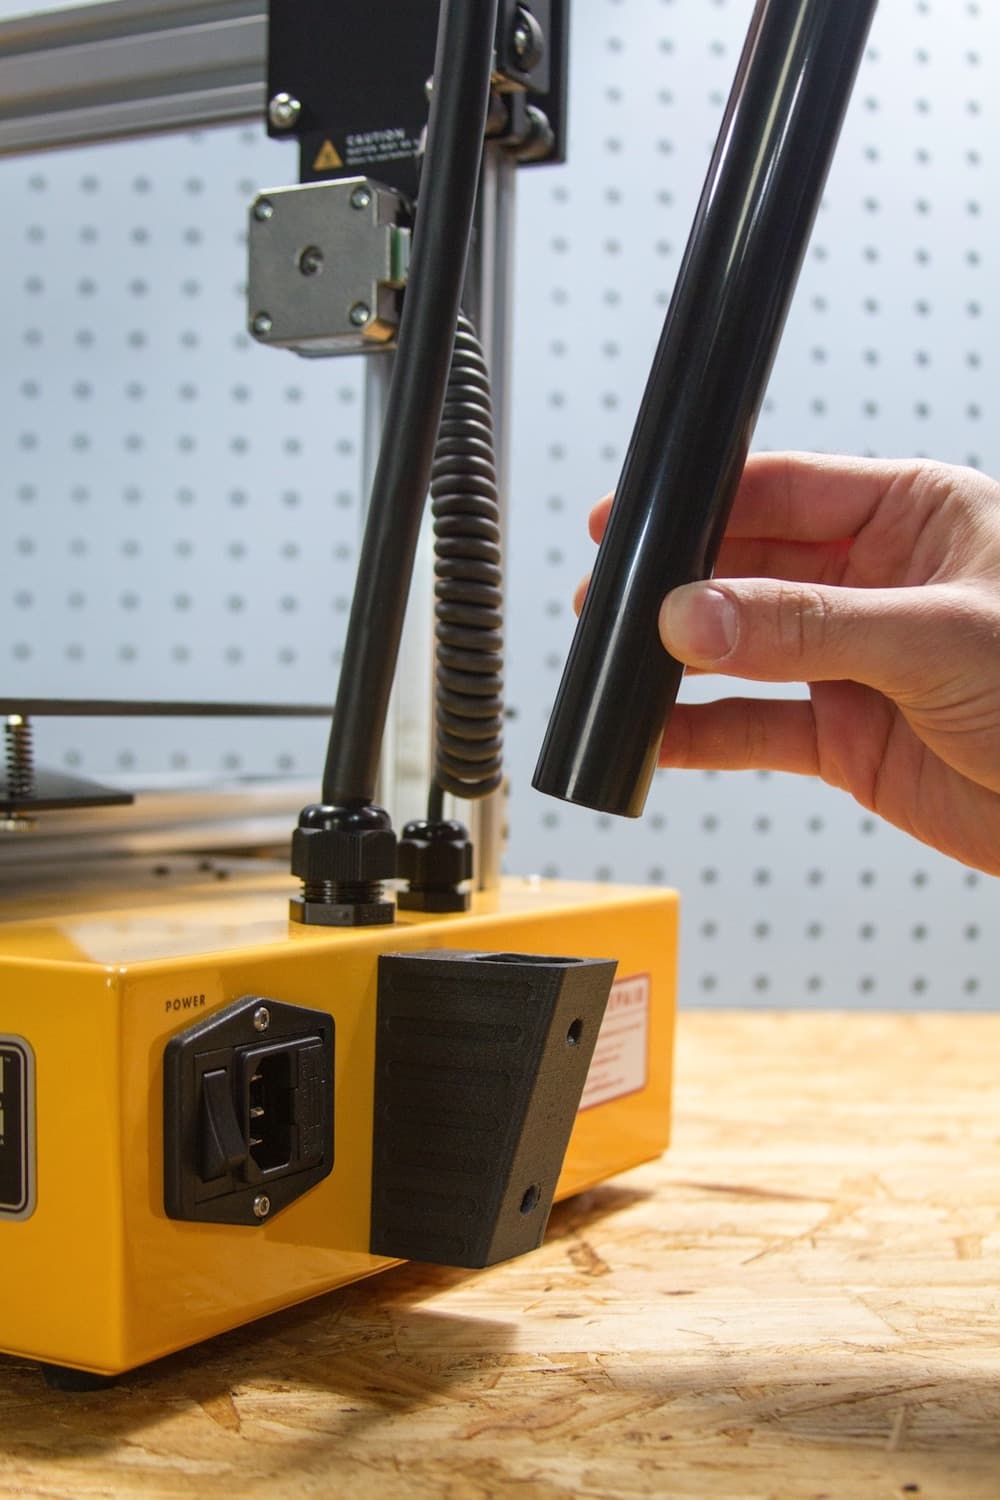
The top of the spool holder arm should be parallel with the back edge of the Printer and facing away from the Z axis, as shown in the image below.
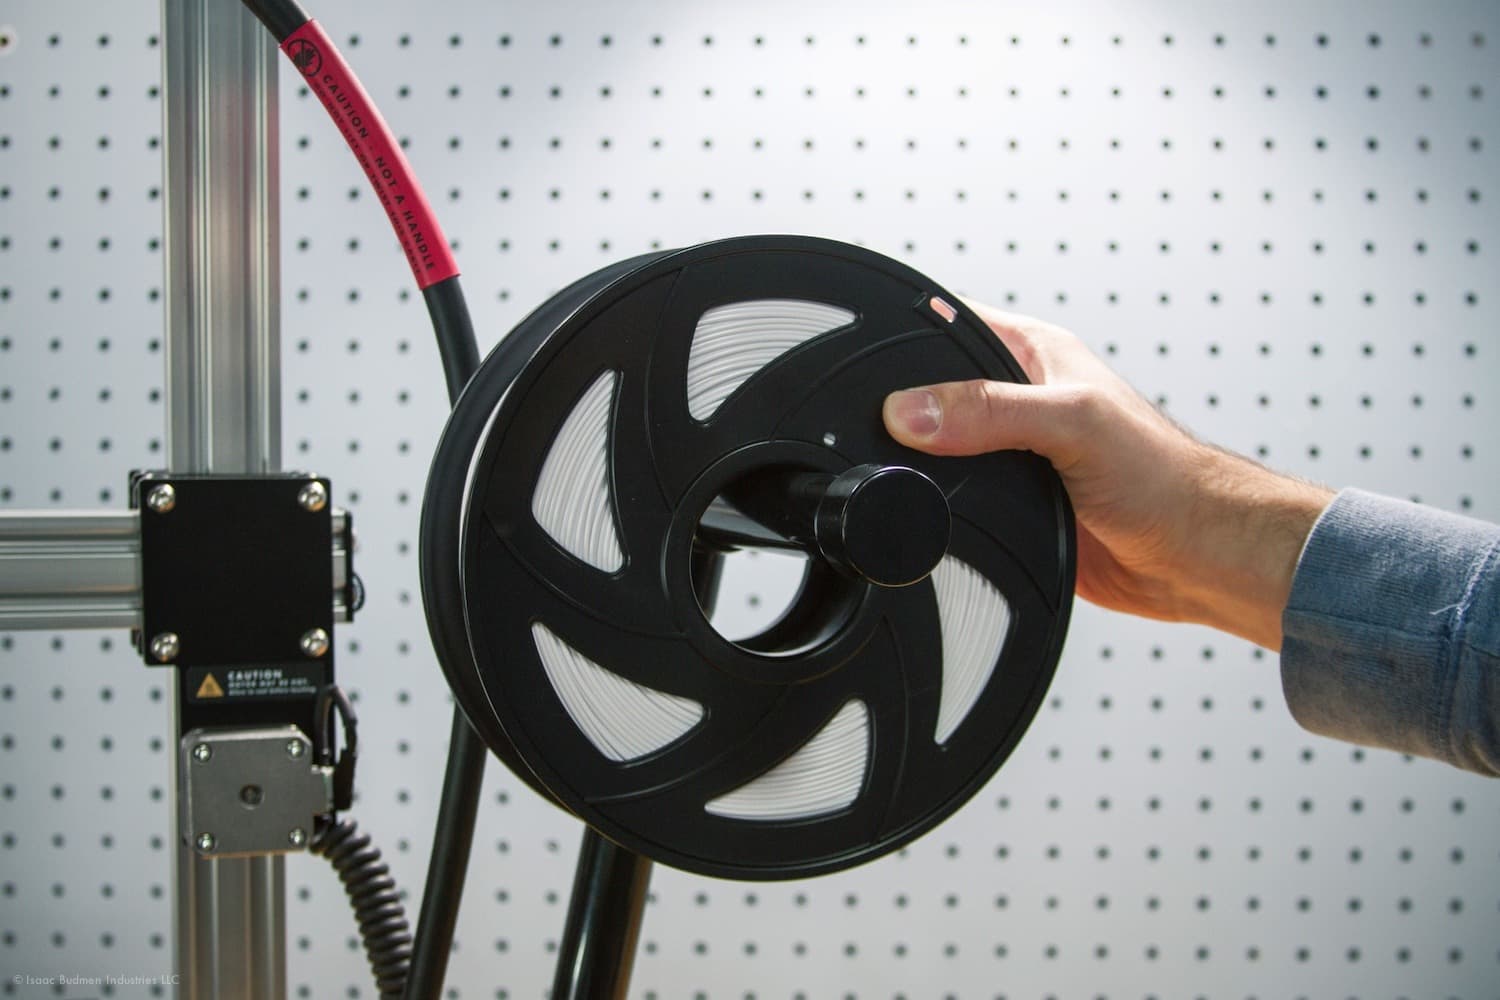
Place the provided filament on the spool holder arm. The filament should be oriented so that the loose end comes over the top of the spool and faces the front of the machine.
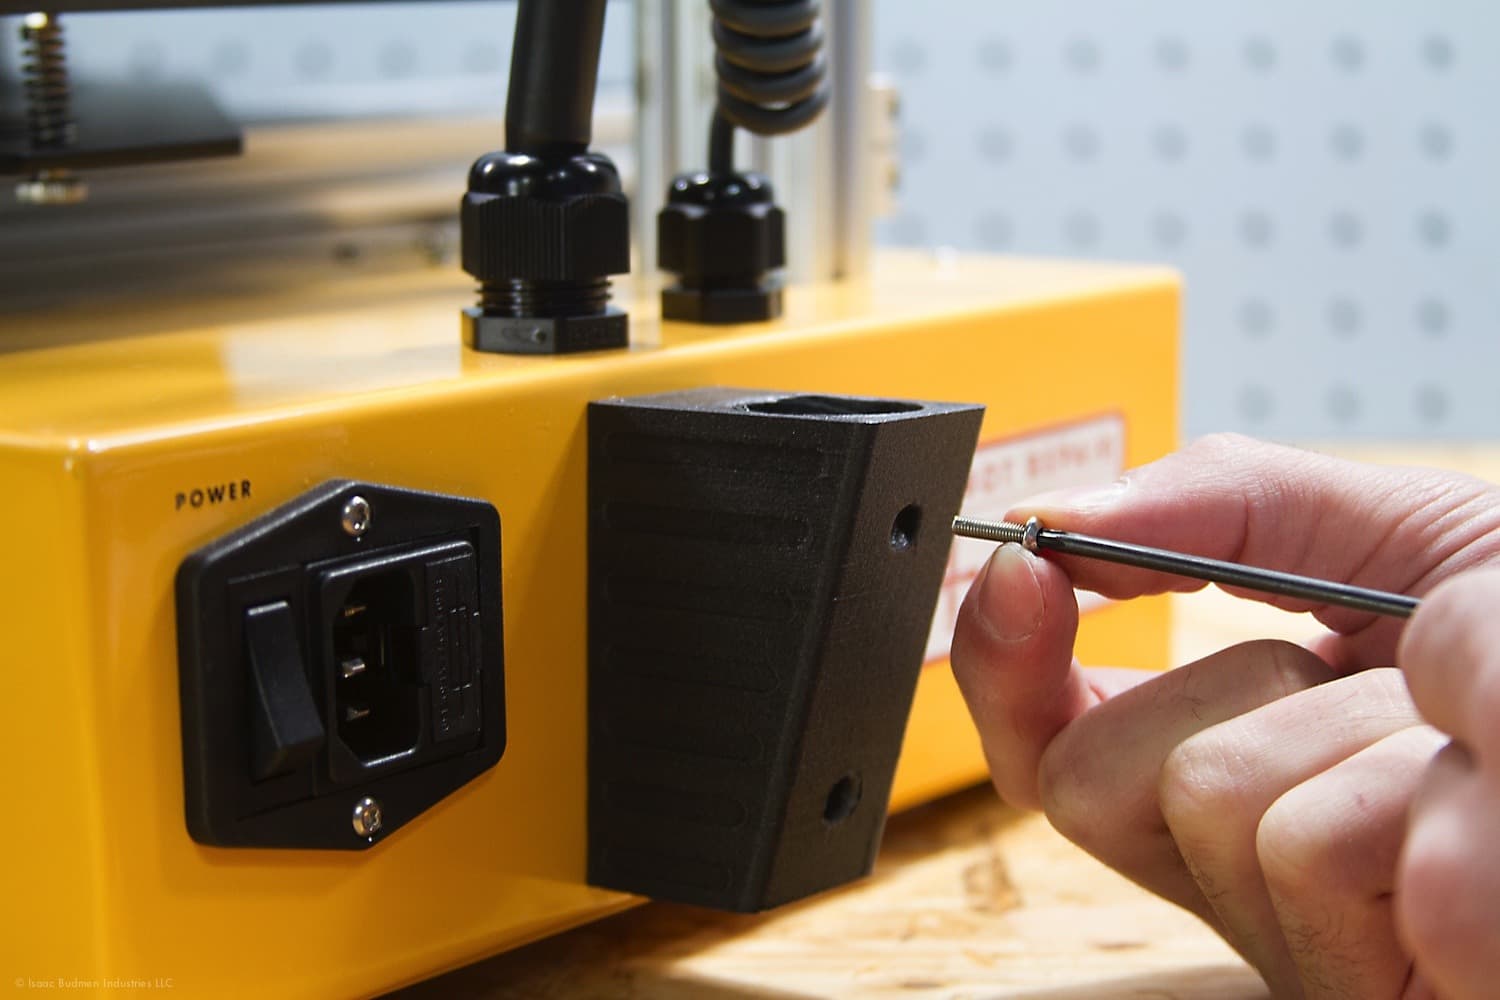
Step 3:
PLUG IN 3D PRINTER
The power inlet on the Buildini™ is located on the back, next to the spool holder attachment. Set the power switch on the Buildini™ to the off position as shown in the image below. Plug the provided power cord into the Printer.
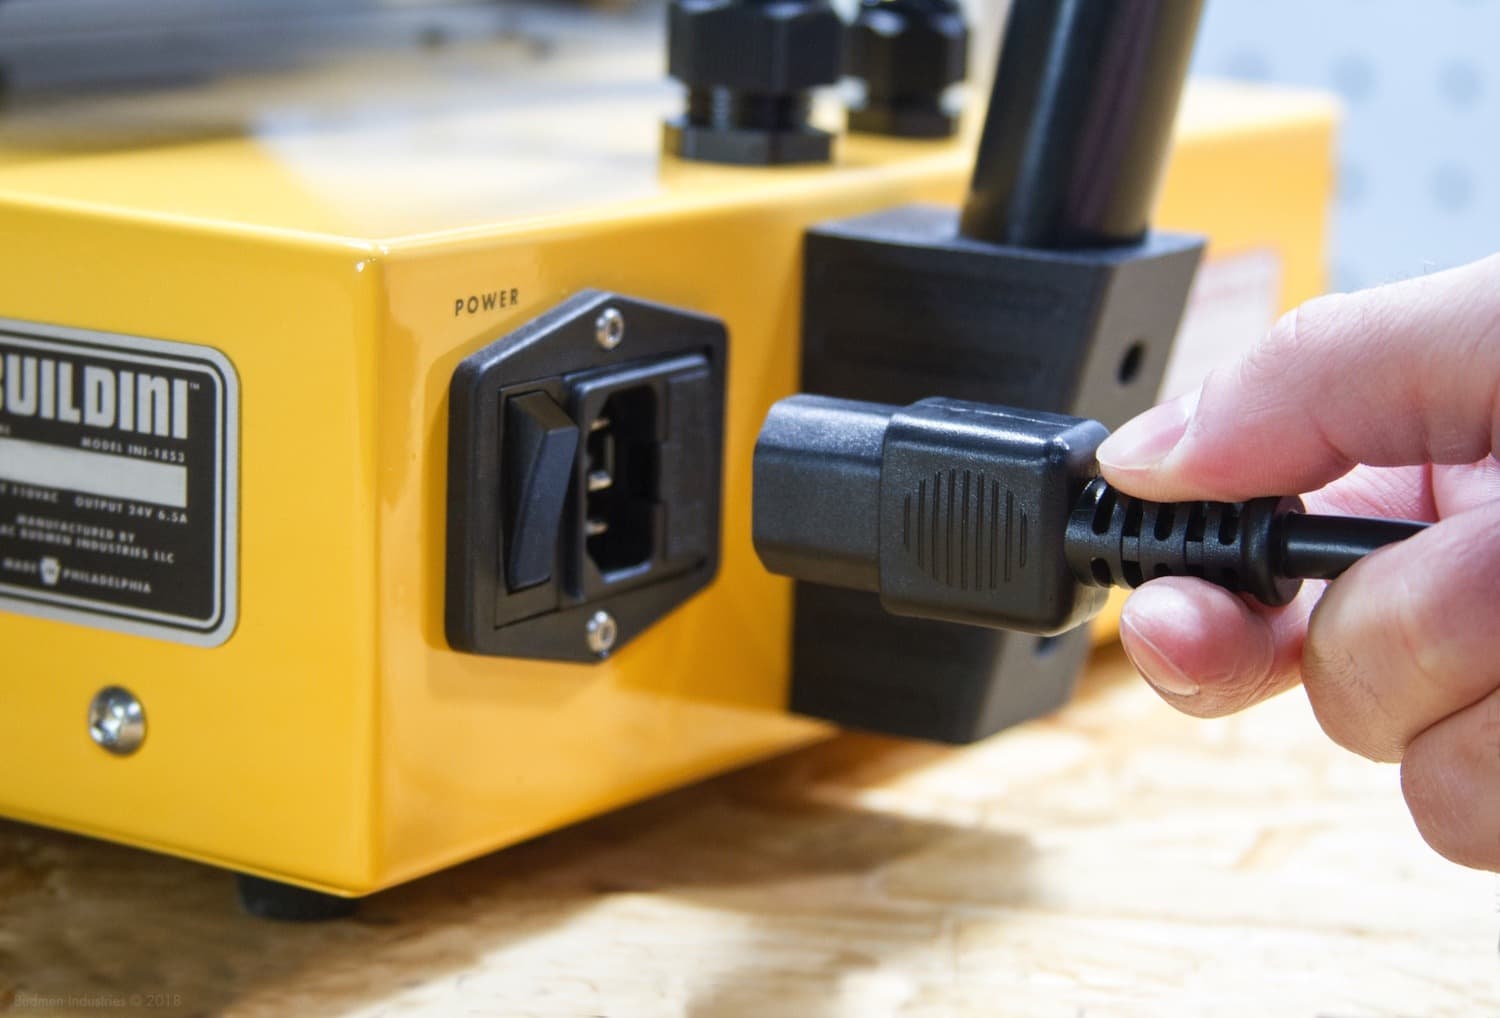
After inserting the plug into the 3D Printer, take the other end and plug it in to a close wall outlet. If the cord length is insufficient, use an extension cord. Be sure the extension cord is rated for the Printer’s power requirements. Click the power switch to turn on the 3D Printer.
Step 4:
LOAD FILAMENT
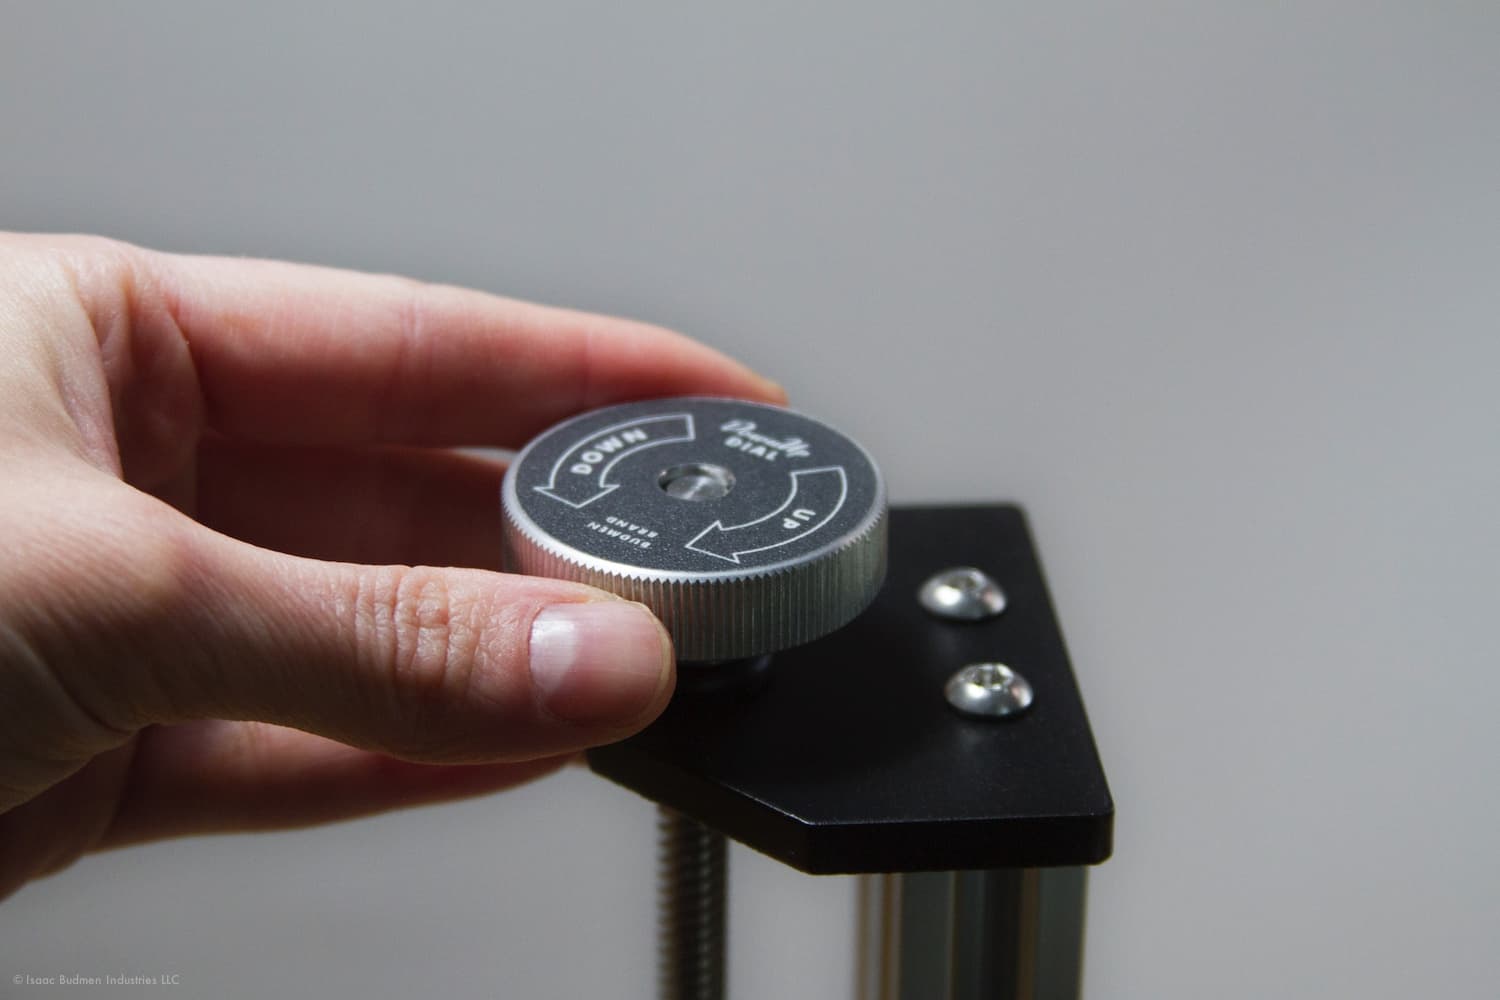
By turning the DownUp Dial at the top of the 3D Printer, raise the extruder at least one inch (1 in) above from the build platform. This is to prevent any heat damage from the nozzle to the build platform.
From the Main Menu on the LCD screen, navigate to Control and click the Spin-N-Select Knob to select.
From the Control menu navigate to Temperature and select.
Set the temperature to 220°C then click to select. This is the print temperature for the PLA filament that came with your Buildini™.
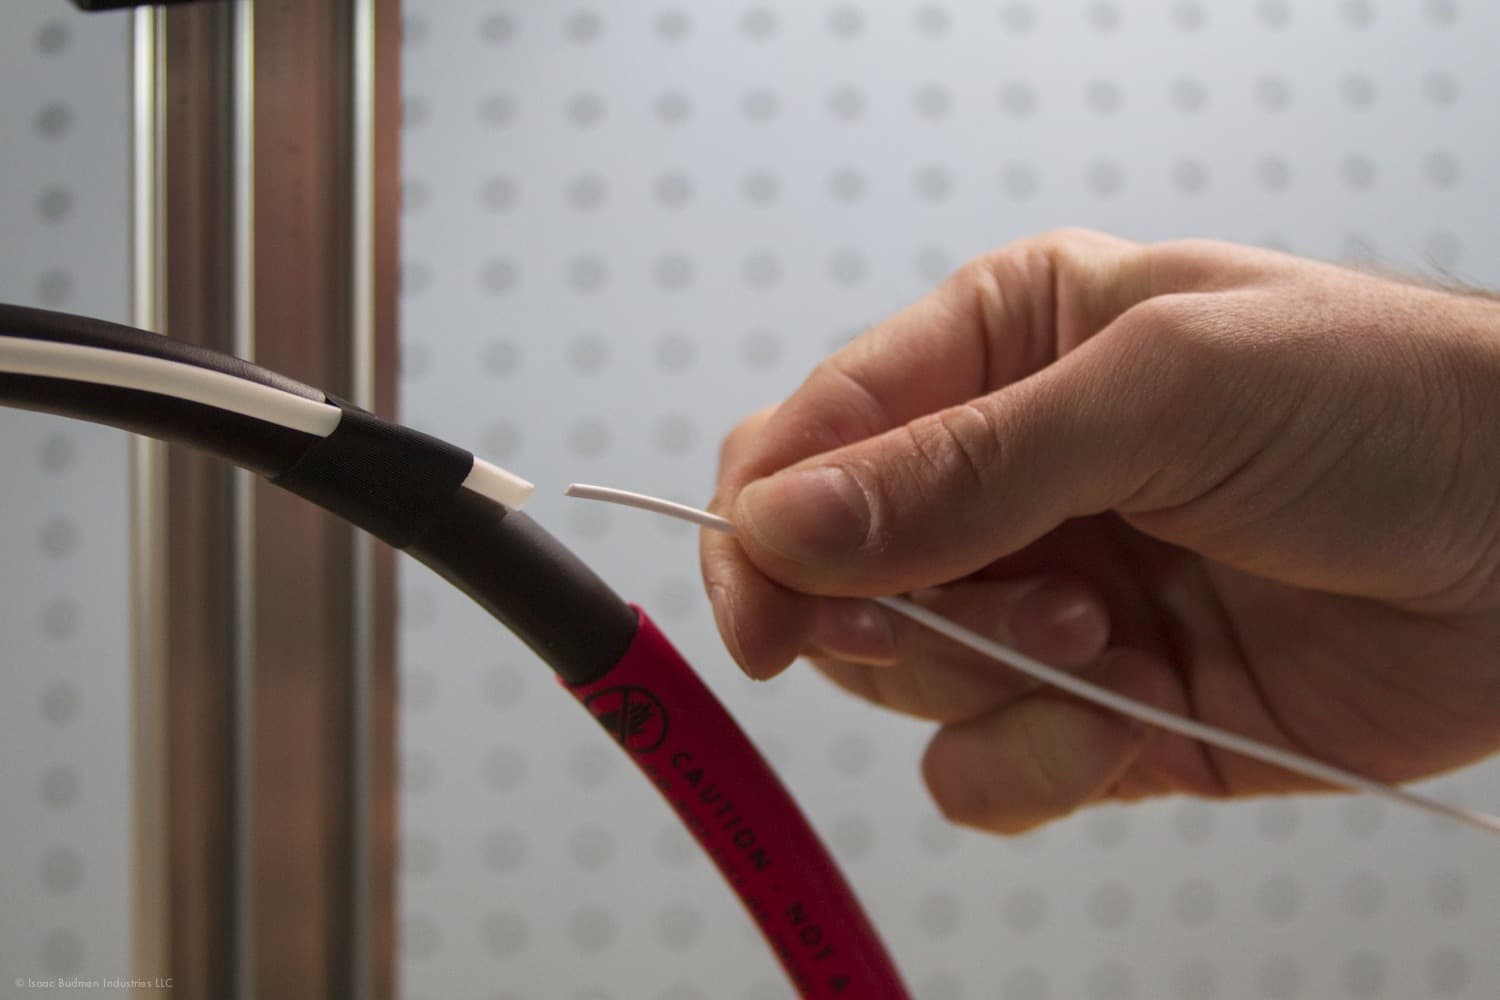
After the Printer reaches the temperature, thread the filament down the white Teflon guide tube until the filament shows through the other end.
Pinch the load lever located at the top of the extruder in the direction of the small arrow, and simultaneously with your other hand, insert the tip of the filament into the Printer.
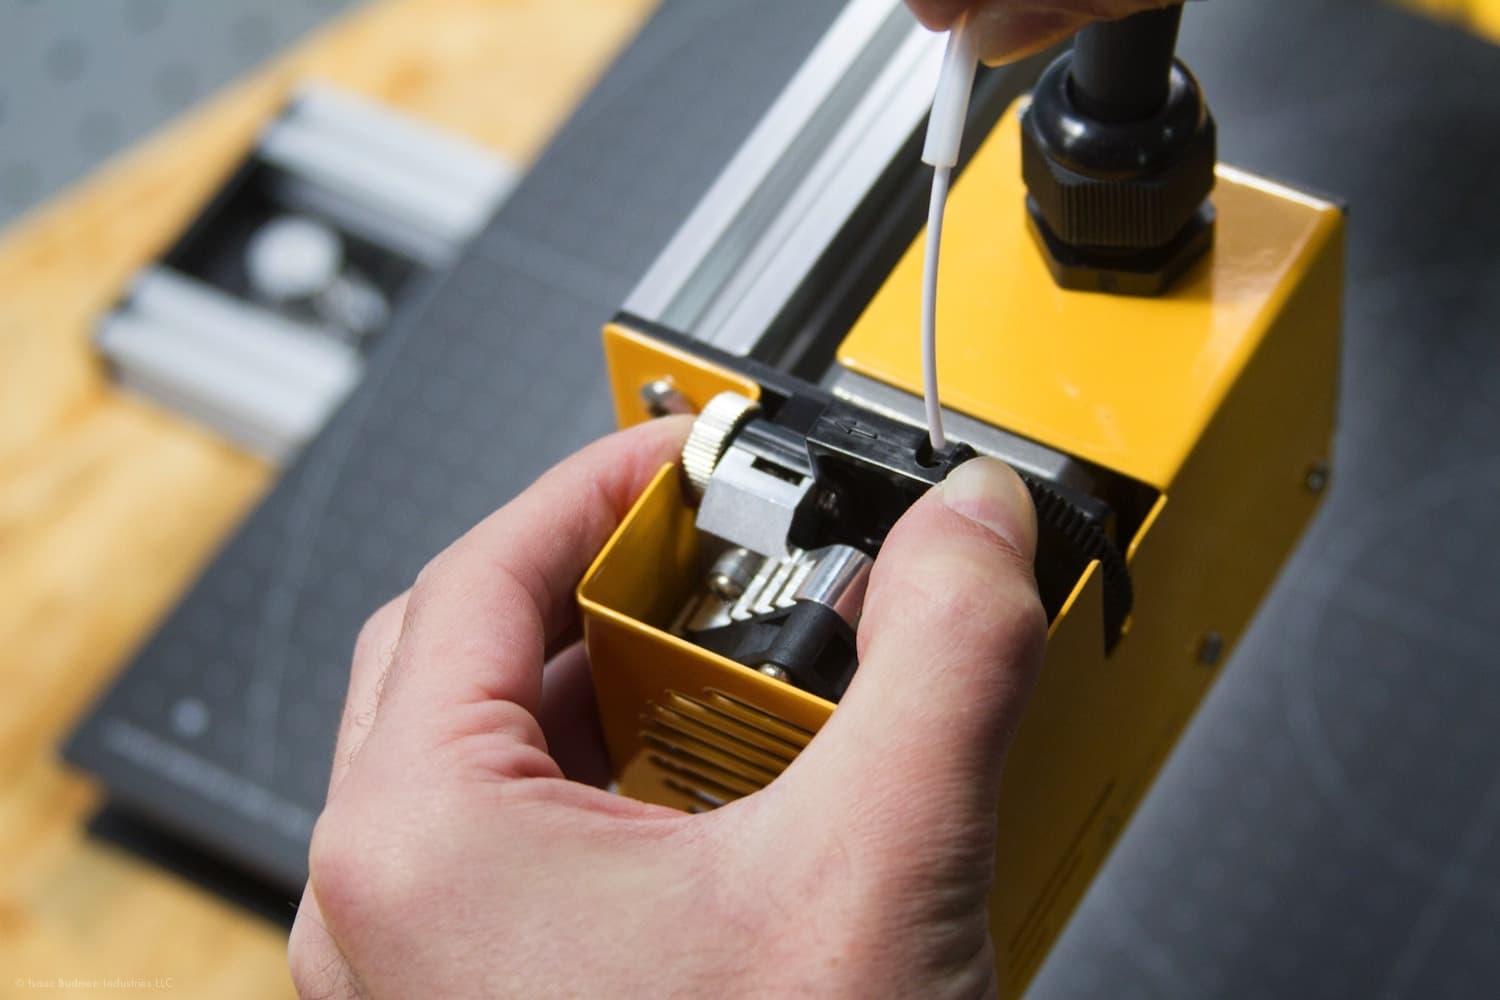
Continue inserting the filament into the Printer until plastic extrudes from the nozzle. With the snippers from the Robot Repair Bag, cut a clean edge of the filament. Never put your fingers on or near the nozzle, as an injury may occur.
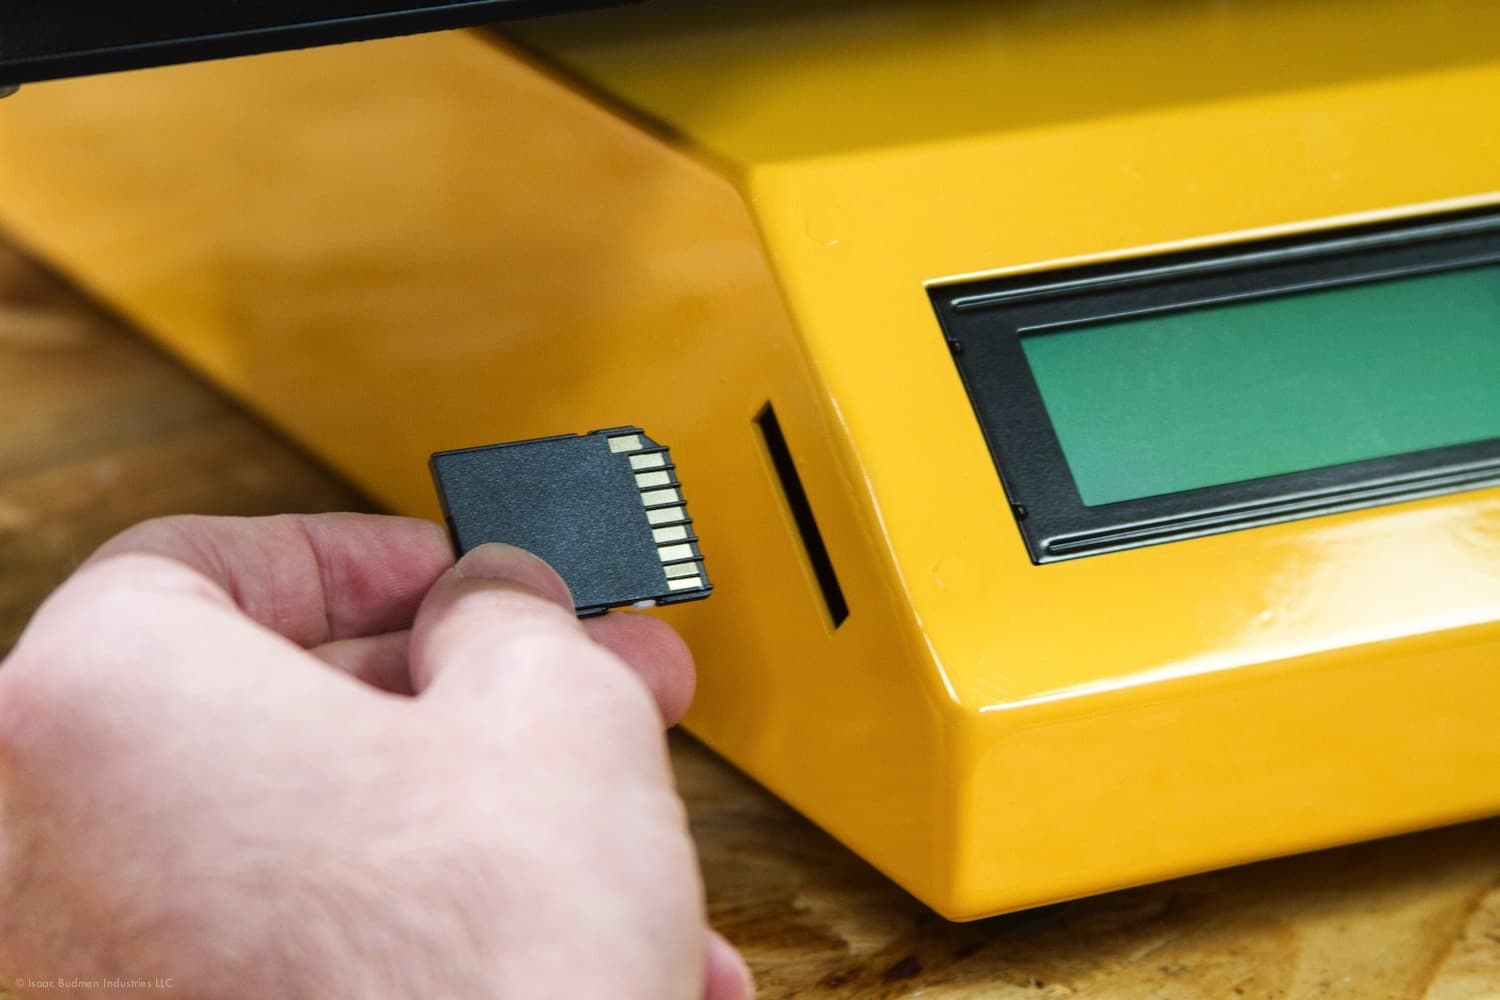
Step 5:
PRINT TEST OBJECT
The SD card from your Robot Repair Bag includes a pre-loaded file for printing a test object. Insert it into the SD slot located on the front left of the Printer.
From the Main Menu on the LCD Screen navigate to the Print from SD and click to select.
Choose TEST-PRINT.G-CODE and click.
Your Buildini™ will now start the print job. First it will home all axes. Then it will heat up to the temperature set in the print job. Then the Budmen Buildini™ will begin printing.
Step 6:
PROBING SEQUENCE
First the Printer will home all axes. After homing, it will move to the first probe point. As the nozzle probes, it will move towards the build platform twice; the first is a quick probe, the second is slower and more accurate.
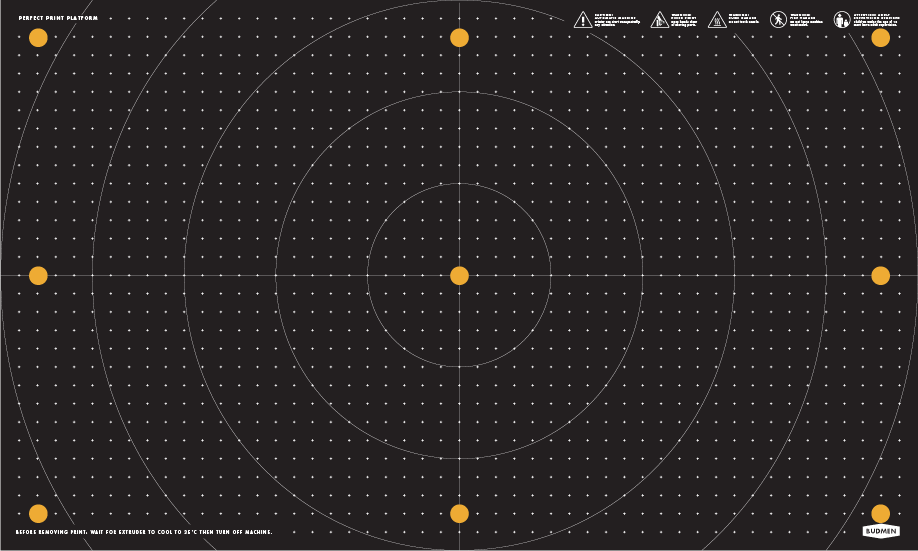
The yellow points in the diagram mark the sixteen probe points used in the Probing Sequence
The Buildini™ will probe sixteen spots in a grid pattern. After probing, the Printer will begin printing.
Step 7:
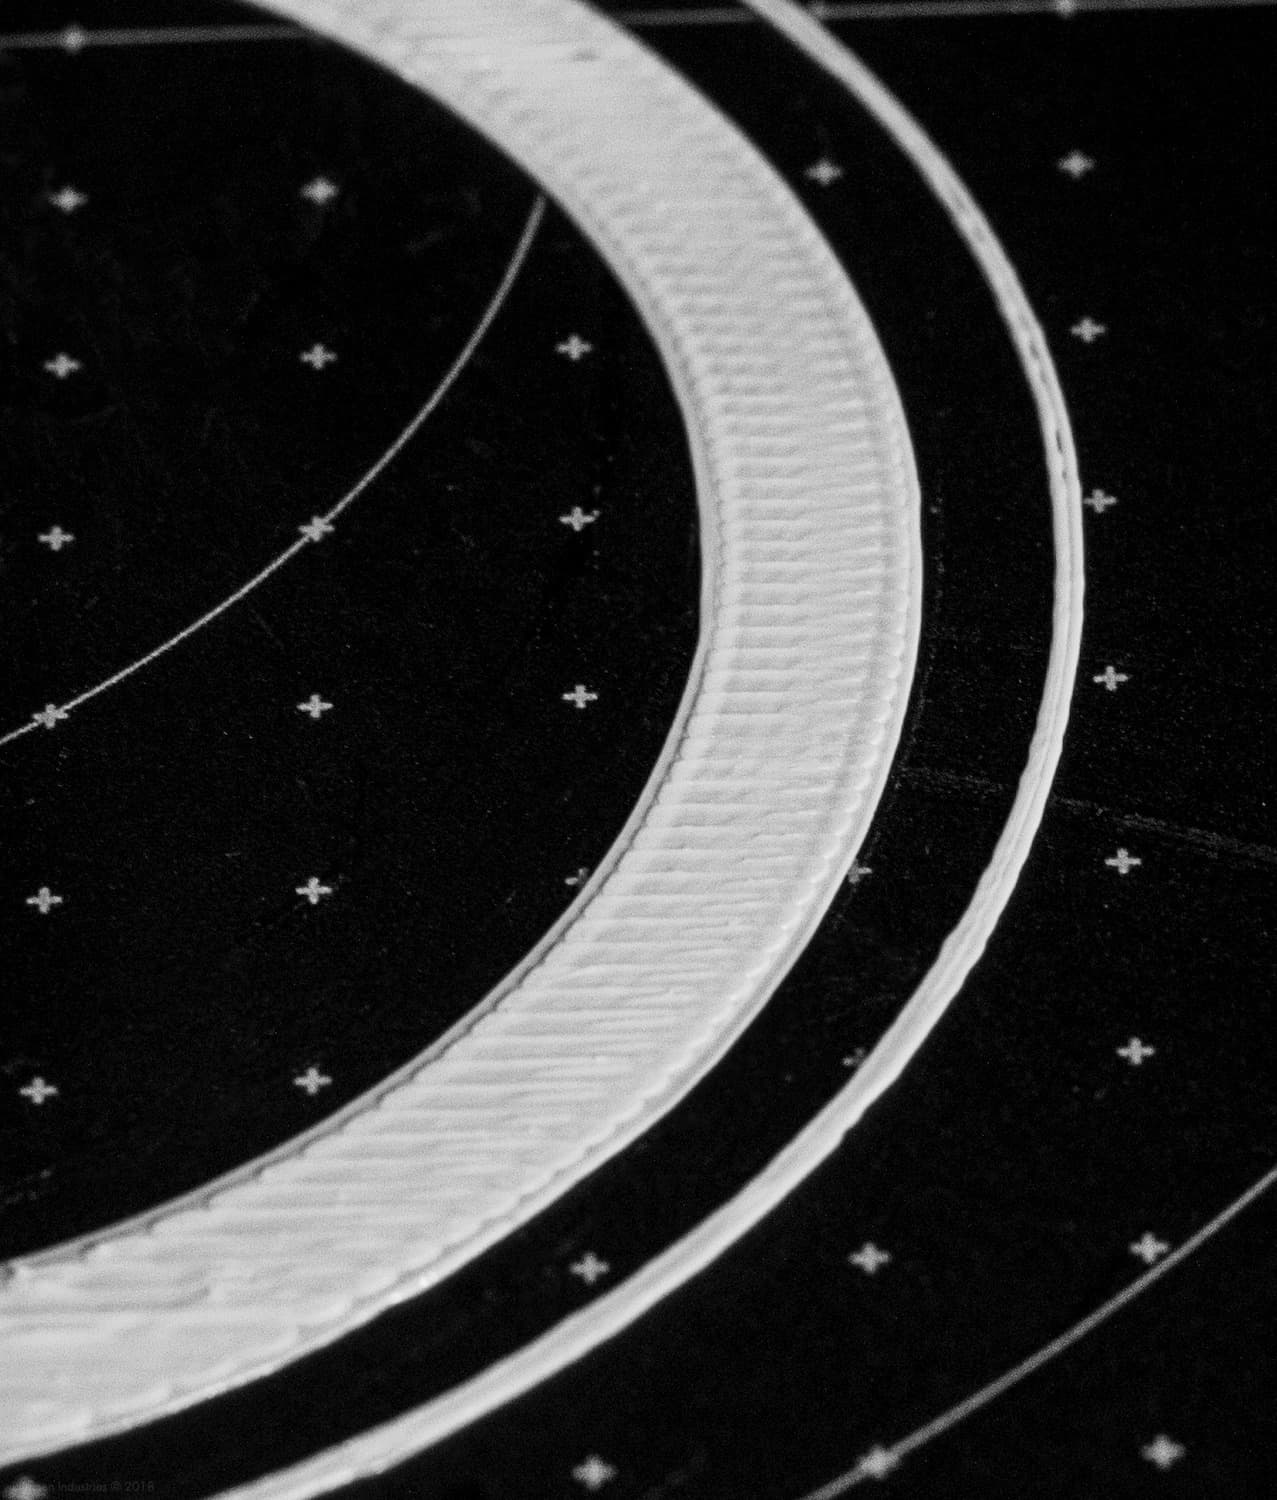
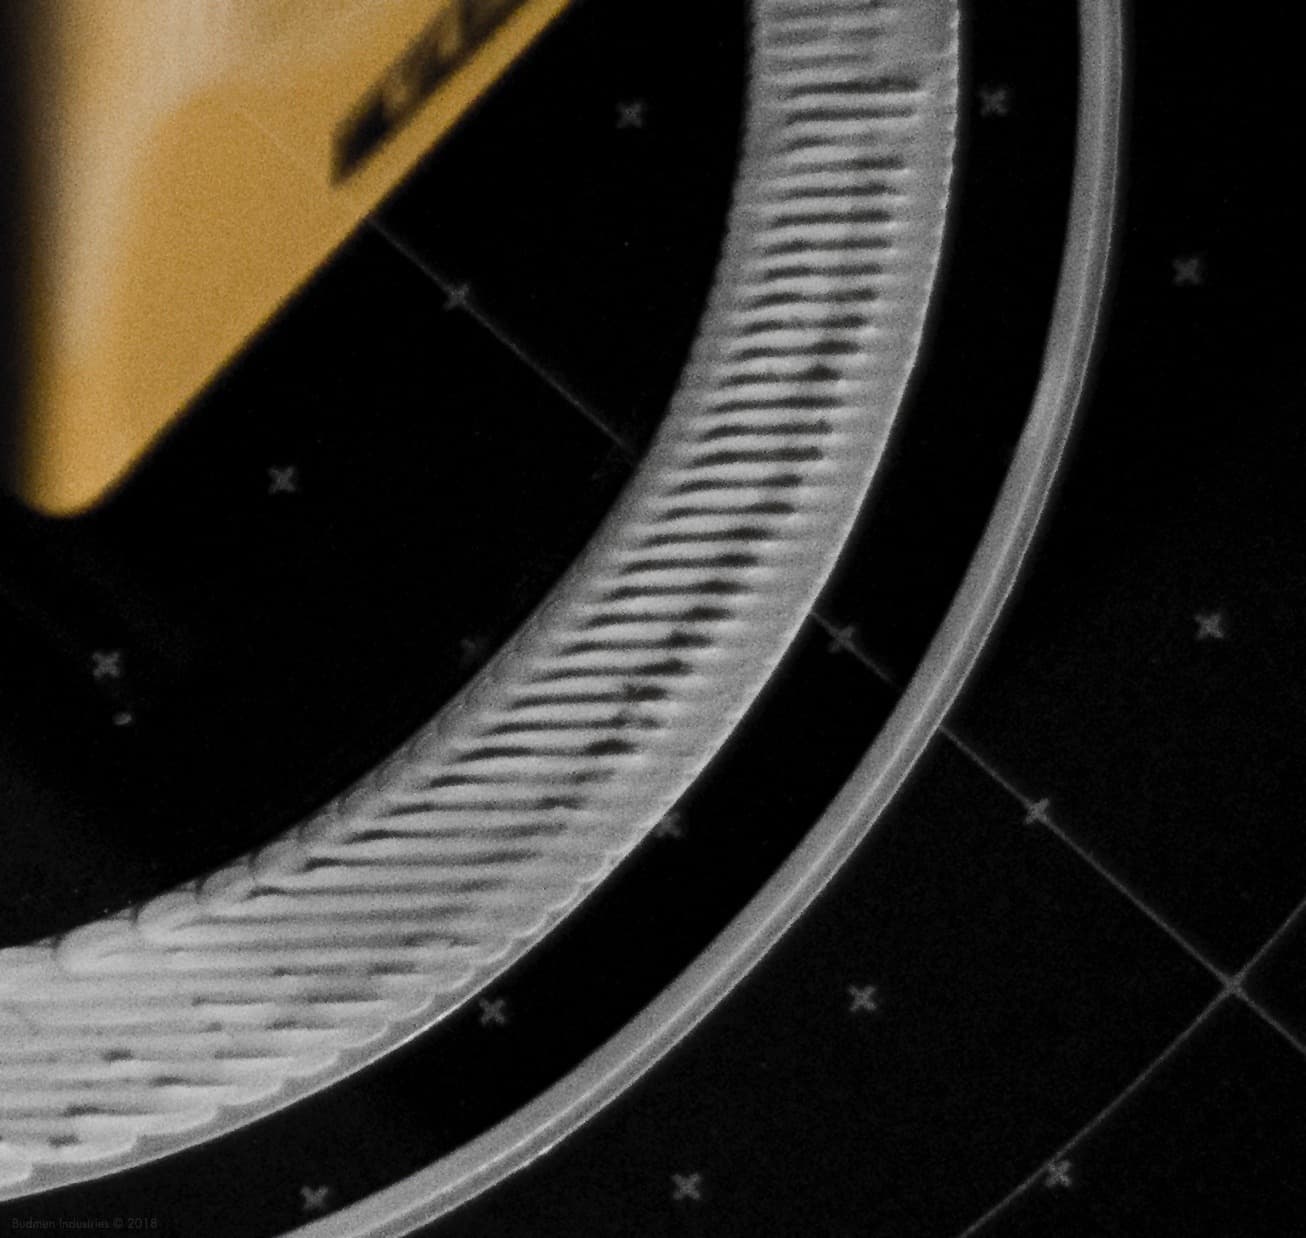
WATCH FIRST LAYER
Always watch the first layer of every print to make sure the filament is adhering properly. The first layer of an object needs to be evenly extruded to successfully adhere to the print surface. If the extrusion is not even, the plastic will not stick correctly.
As the first layer prints you may need to adjust the nozzle height to achieve an even first layer. Proceed to Step 8 to see examples of an even first layer and to learn how to adjust the nozzle height.
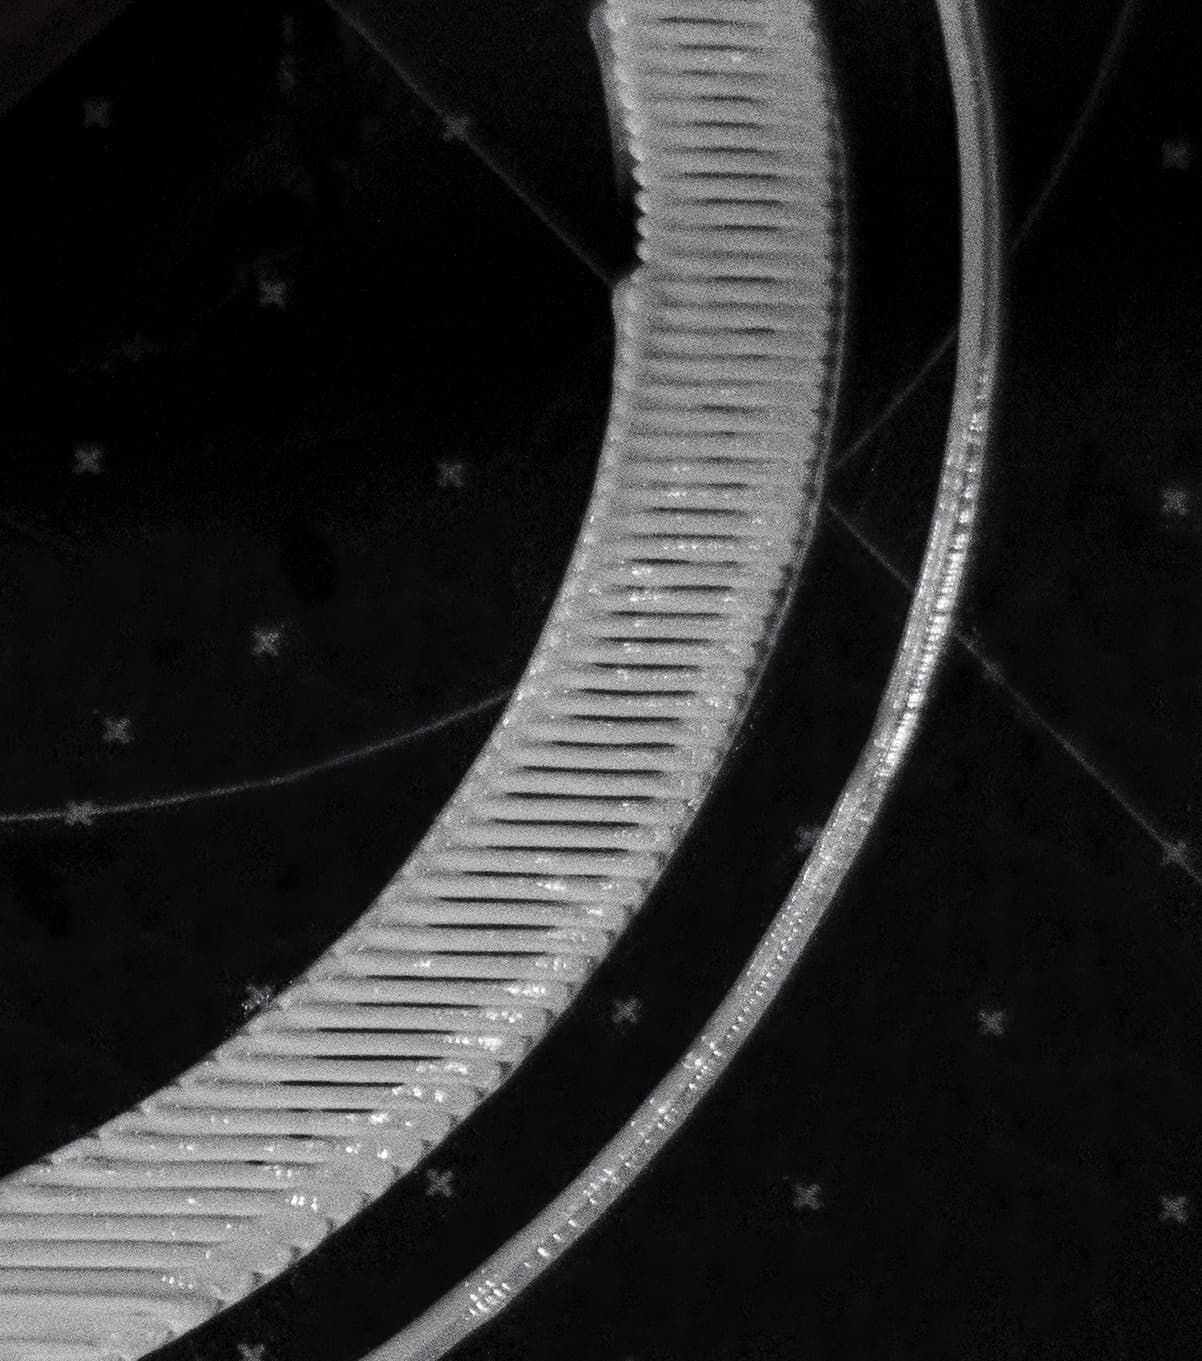
Step 8:
WATCH FIRST LAYER
The Nozzle Height Menu is used to increase or decrease the distance between the tip of the nozzle and the build platform. If the nozzle is too far from or too close to the surface, there will be print issues. Such as, the first layer of a print will not adhere to the build platform.
Once the print starts, go to Tune and select Nozzle Height. This gives you the option to tweak the height of the nozzle by small increments.
Use the Spin-N-Select Knob to raise or lower the value until the extruded plastic is sticking evenly to the build surface. Refer to the first image on the right as an example of an even first layer.
If most of the first layer is too close or too far, the print may need to be restarted.
Use your best judgment to determine if the print should be stopped and then restarted.
Top Image: Nozzle height just right
Middle Image: Nozzle too close
Bottom Image: Nozzle too far
Step 9:
REMOVE OBJECT FROM BUILD PLATFORM
When your object is finished printing, the Printer will stop moving and begin cooling down. The fans will turn off when the nozzle is at room temperature.
Before removing your print, wait for the extruder to cool to 35°C then turn off your Printer. Now remove your finished object.
Take the Print Removal Spatula from your Robot Repair Bag and with your non-dominant hand, hold the build platform on the side to prevent it from moving back and forth. With your dominant hand take the spatula and gently pry up one edge of the print.

With the spatula, slowly work your way underneath the object until it comes free from the build platform.
Enjoy your first Buildini™ 3D print!
Step 10:
SETUP SLICING SOFTWARE
Now that you have finished your first print, you will need to download and setup the slicing software to print original designs.
Click on the button below to download and setup Cura Slicing Software to work with your Buildini.
[sc name="Learn Share"]