USER GUIDE 4
Build Platform Leveling
Step-by-step guide to leveling the Buildini™ build platform. NOTE: This is only for Buildini Generation 1, printers without intelligent calibration system.
Step 1
HOME ALL AXES
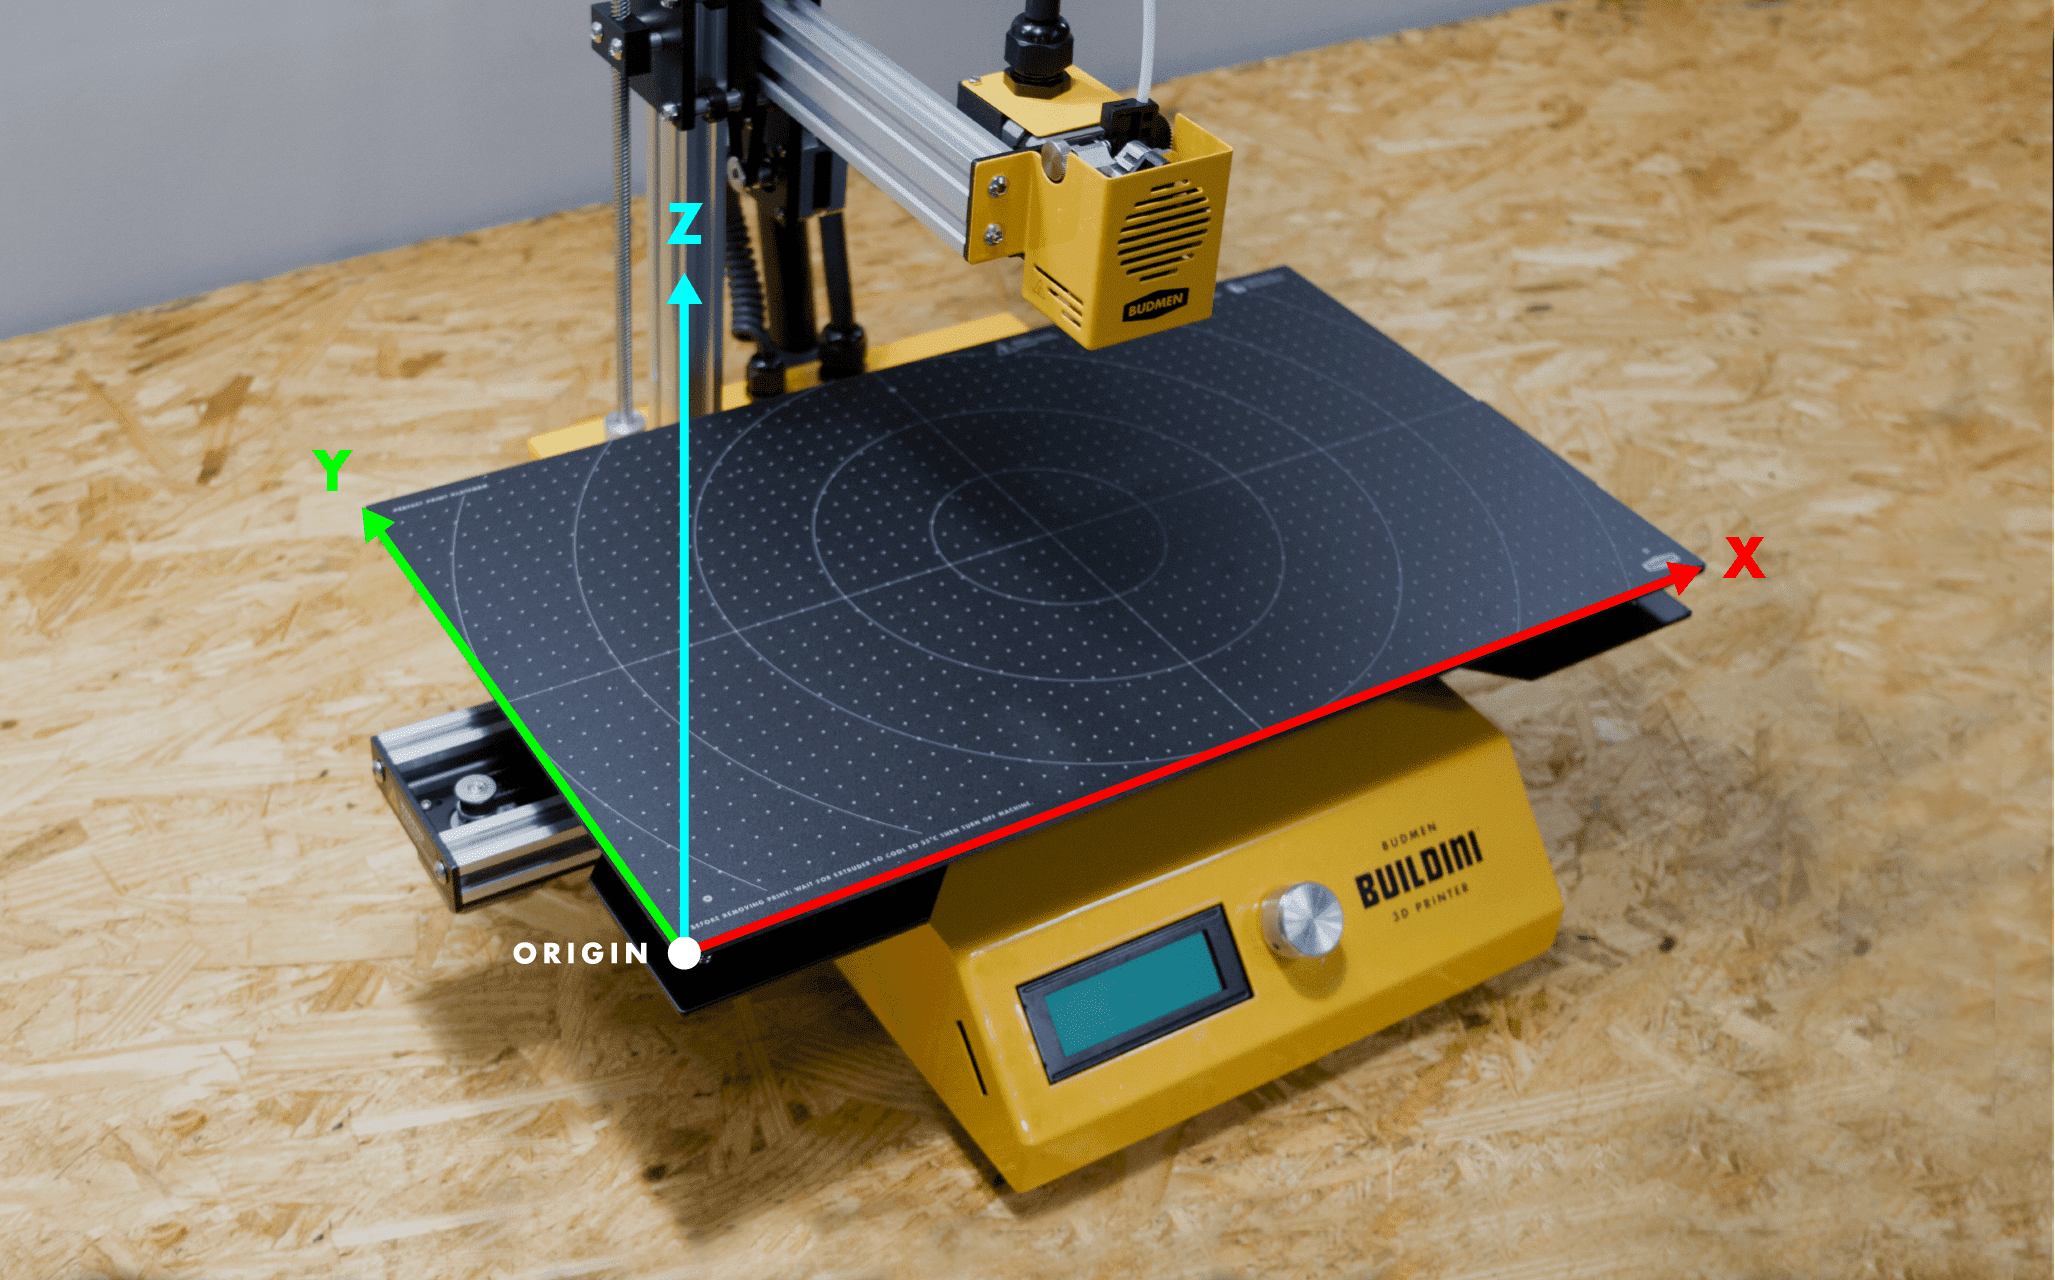
From the Main Menu on the LCD screen, navigate to Prepare and click the Spin-N-Select Knob. From the Prepare menu, navigate to Auto Home and click the knob again. The Printer will now “home.” This means it will go to the origin of the build platform: the front left corner. This is the spot where all of the Buildini™ 3D prints will begin.
Step 2
LEVEL THE FIRST POINT
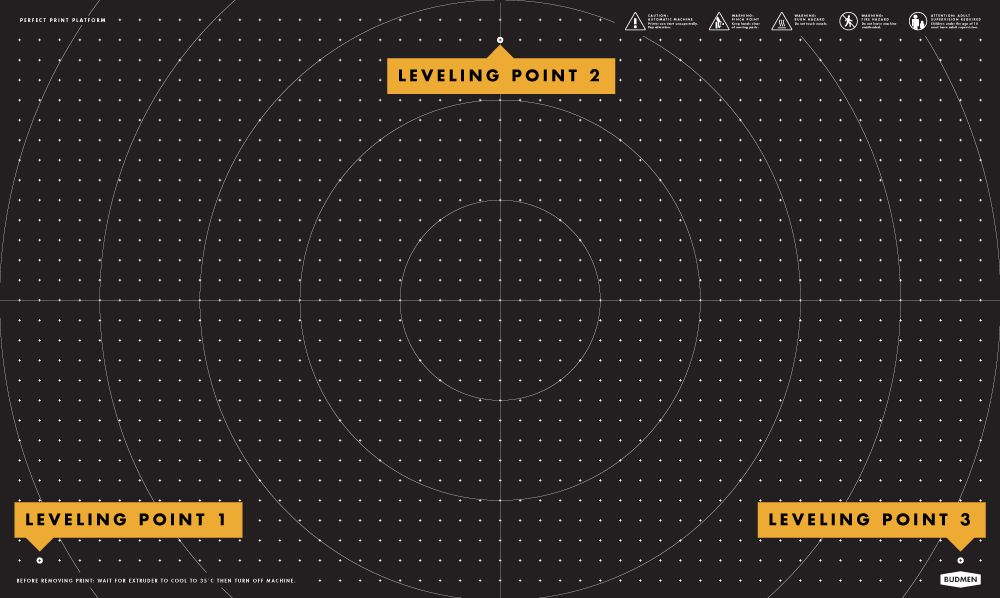
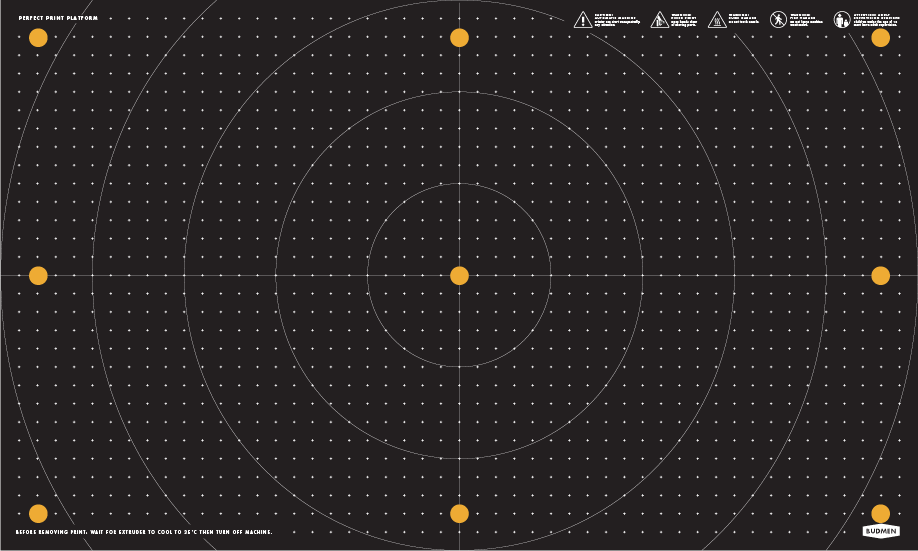
On the build platform, there are three leveling points, each with a leveling knob underneath. Each leveling point is indicated by a small white circle with a black cross. The build platform will raise or lower by adjusting the leveling knob.
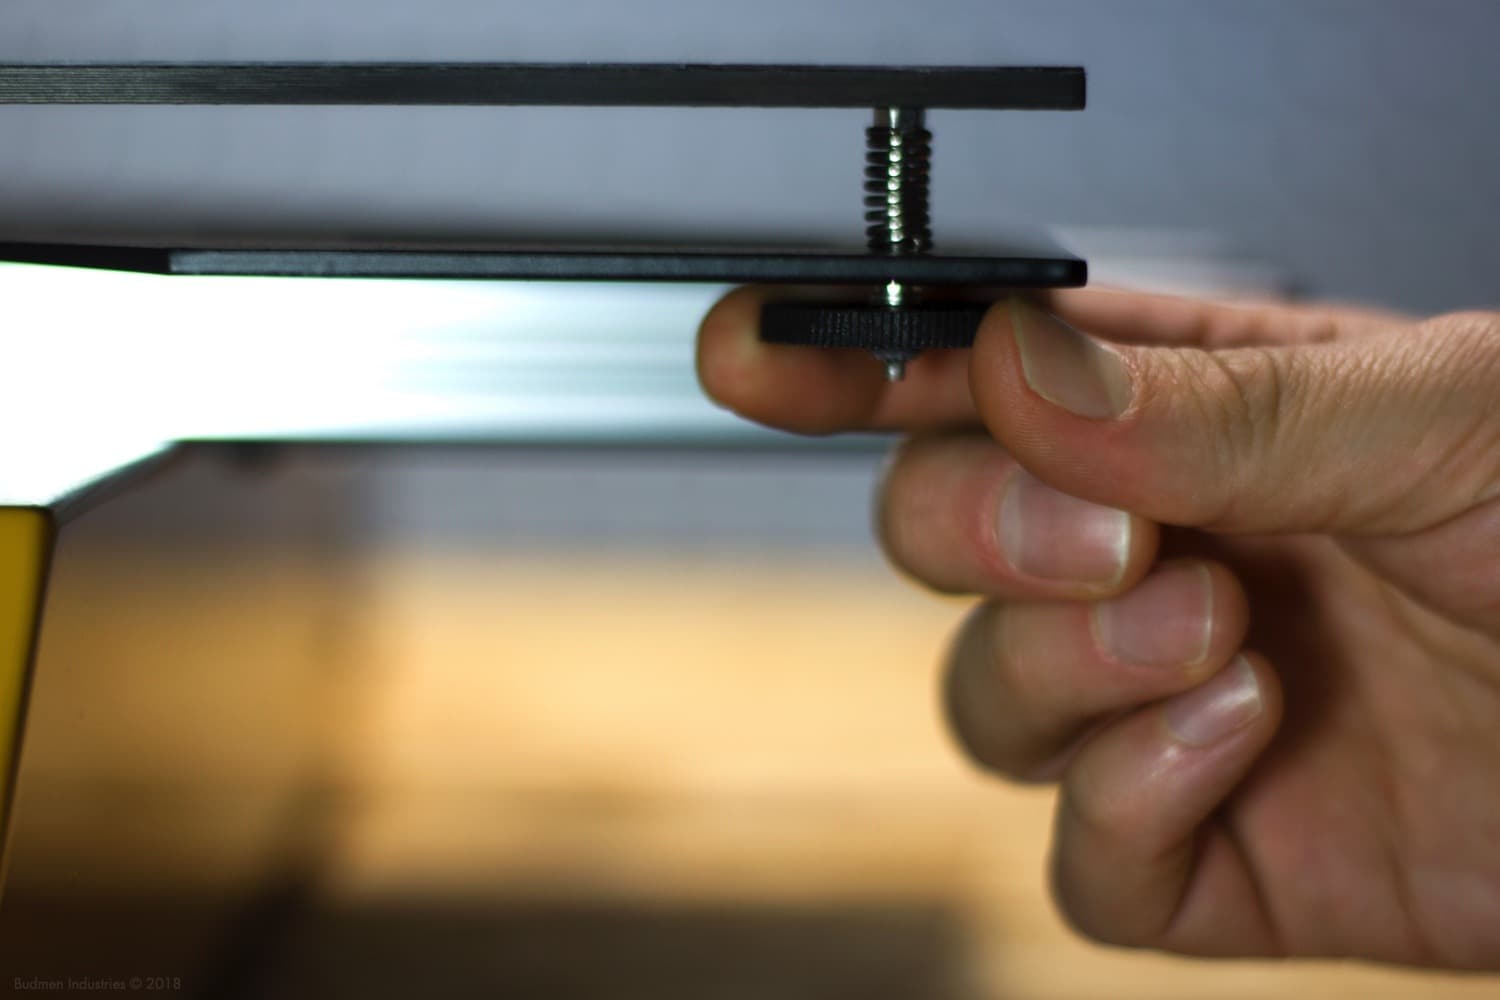
Return to the Prepare menu on the LCD screen and select Disable Motors. This will allow you to move the axes by hand. Move both the extruder and the build platform to position the nozzle over one of the leveling points.
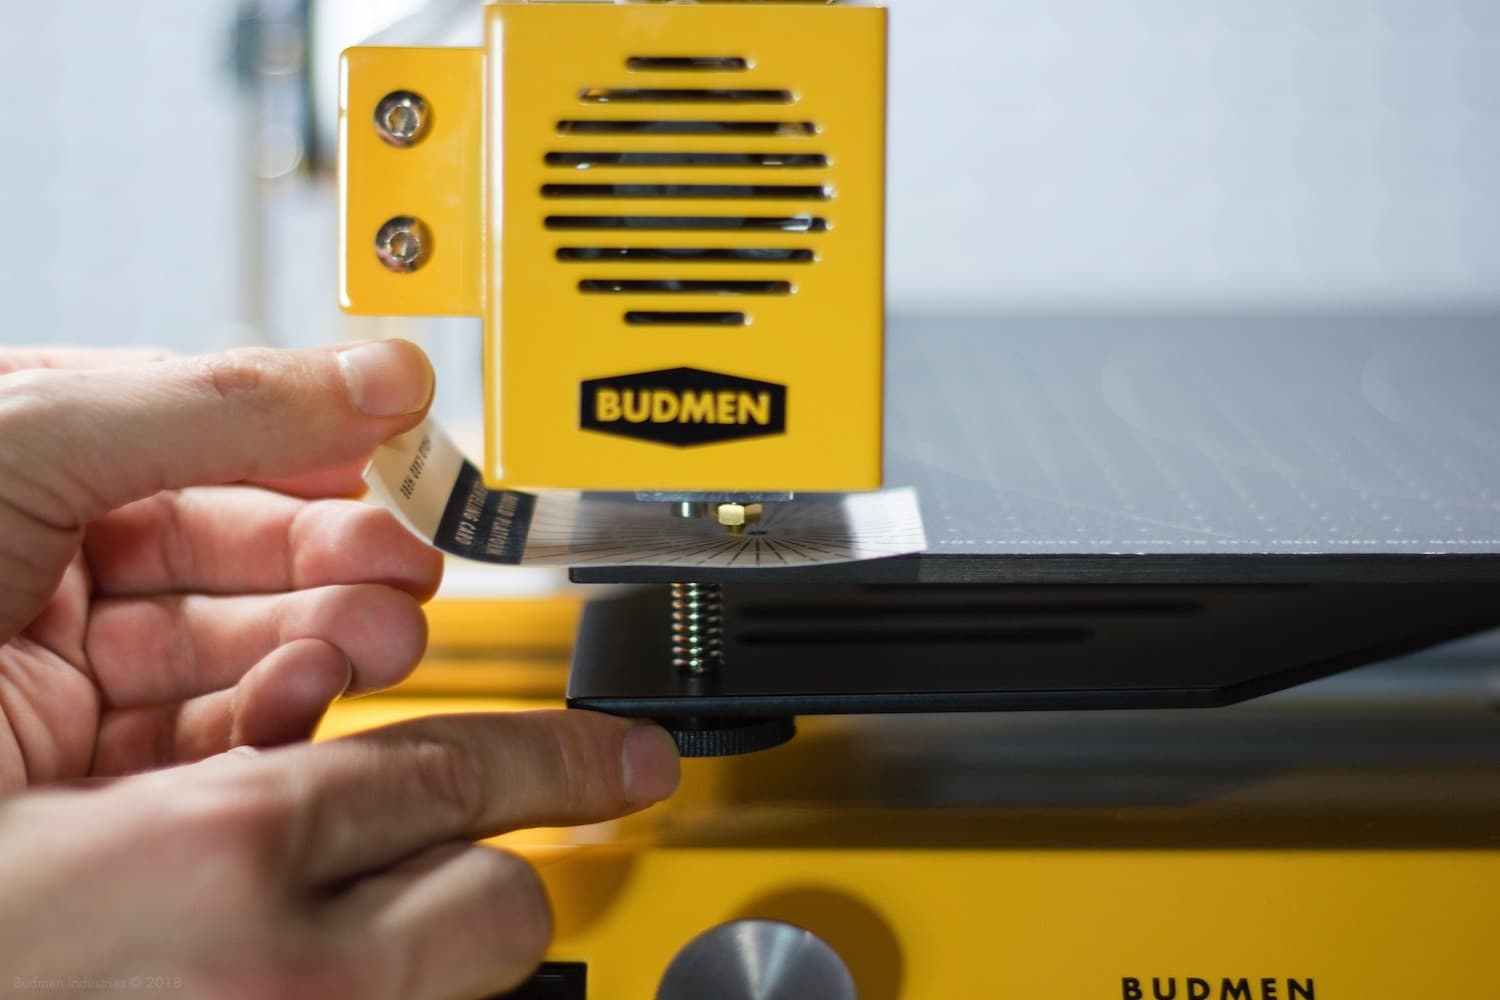
Place the provided leveling card between the leveling point and the nozzle. As you move the leveling card back and forth, there should be a slight friction between the card and the nozzle. Tighten or loosen the leveling knob to achieve this friction.
Step 3
LEVEL THE REMAINING POINTS
Manually move the build platform and the extruder horizontally to the next leveling point. Repeat this process for the remaining two leveling points. Recheck the first point as it might need re-adjusting. Double check that all three points are level. This is important because it is possible that during the initial adjustment, the leveling may have changed. This process may take a few minutes to obtain a level build platform.
Step 4
MESH LEVELING
Leveling the build platform with the three leveling screws is a good start for getting a flat print surface, however, the Mesh Leveling feature takes it a step further to ensure a superior first layer.
Mesh Leveling compensates for any minor curves or tilts in the build platform by creating a digital mesh used as a reference during printing.
The Buildini™ will probe nine spots on the build platform, creating a grid. If one spot is slightly higher or lower than the others, it will raise or lower the nozzle while printing to compensate for the difference.
Make sure the nozzle is clean and free of plastic. From the Main Menu on the LCD screen, navigate to Prepare and click the Spin-N-Select Knob. From the Prepare menu, navigate to Bed Leveling and click the knob. Finally select Level Bed.
The Printer will now home then move to the first probe point. When the nozzle moves to the first probe point, place the provided leveling card between the build platform and the nozzle. As you move the leveling card back and forth, there should be a slight friction between the card and the nozzle. Turn the Spin-N-Select Knob to move the nozzle up or down. When there is a slight friction on the card, click the knob to set the height.
The Nozzle will now move to the next probe point.
Repeat the probing process for the remaining 8 probe points. When finished, choose Store Settings from the Bed Leveling Menu.
The mesh leveling sequence needs to be repeated every time a print is started.
Appendix
NOZZLE HEIGHT DIAGRAM
A properly adhered first layer is critical to a successful 3D print. Strong adhesion largely depends on the distance between the nozzle and the build platform during the first layer. Below are common issues and the correct conditions for build platform leveling.
BUILD PLATFORM TOO LOW
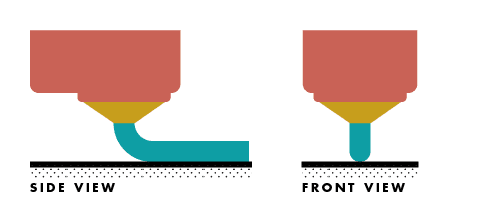
Not enough contact between the filament and the build platform.
Needs more contact area to adhere properly.
BUILD PLATFORM TOO HIGH

Not enough room for the plastic to extrude. This causes gaps from sporadic extrusion or no extrusion at all.
This can cause possible damage to the surface and/or the extruder.
BUILD PLATFORM JUST RIGHT
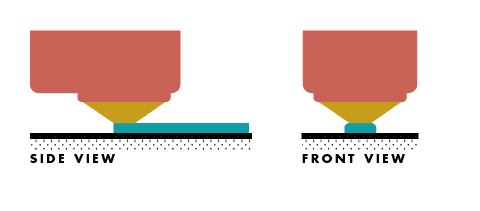
Filament is pushed slightly into onto the bed, maximizing the contact area between the plastic and surface while maintaining a smooth flow of plastic.