USER GUIDE 7
Choosing Slicer Settings
An overview of the slicing settings and print parameters that effect 3D print quality.
Object Resolution
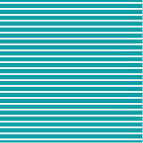
Object resolution corresponds to the layer height, which is measured in millimeters or microns.
Smaller layer heights make for higher resolution objects with smooth surfaces. Smaller layer heights will increase print times.
Larger layer heights are considered low resolution, as the print lines are visible.
HIGH
Layer Height:
0.10mm - 0.15mm
Print Time:
Long
MEDIUM
Layer Height:
0.16mm - 0.29mm
Print Time:
Average

LOW
Layer Height:
0.30mm - 0.40mm
Print Time:
Short
Object Infill
The object infill refers to the inside structure and density of a 3D printed object. It is measured in percent.
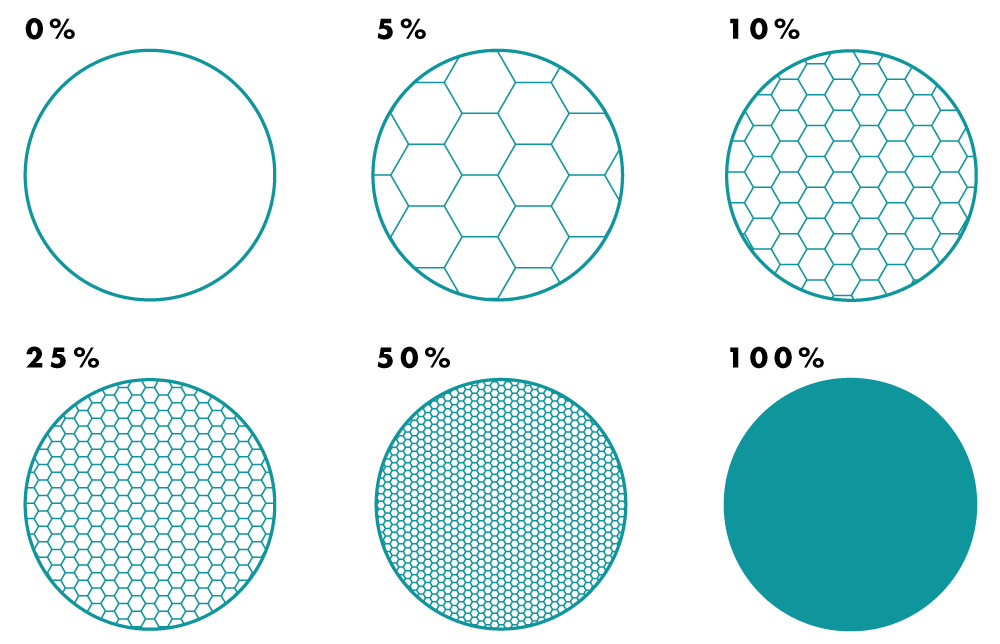 Fig A: Cross-section of cylinders printed with a range of different infills
Objects that need to stand up under heavy use should have denser infills. The denser the infill, the longer the print time will be. Light use and decorative objects can use less infill to save time and money.
Object Shells
Object shells, or perimeters, are the outer layer(s) of the print that make up the walls of your object. The more shells, the stronger your object will be.
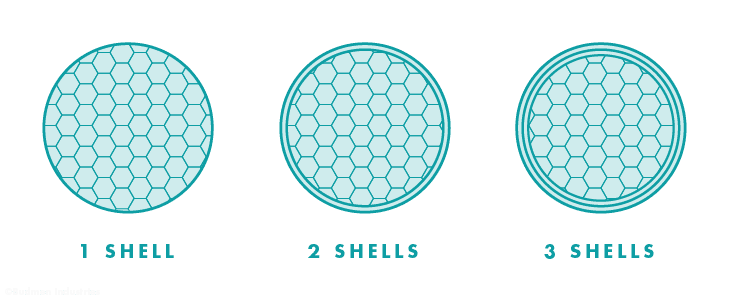 Fig A: Cross-section of cylinders printed with varying shell counts
Use fewer shells when creating display items, such as sculptures. Use more shells when your 3D printed object needs to withstand heavy pressures or stress, such as mechanical parts. Adding shells will also increase the print time and use more material.
SUPPORTS
Support material is removable and discarded 3D printed material used to successfully fabricate overhangs, bridges, and negative space
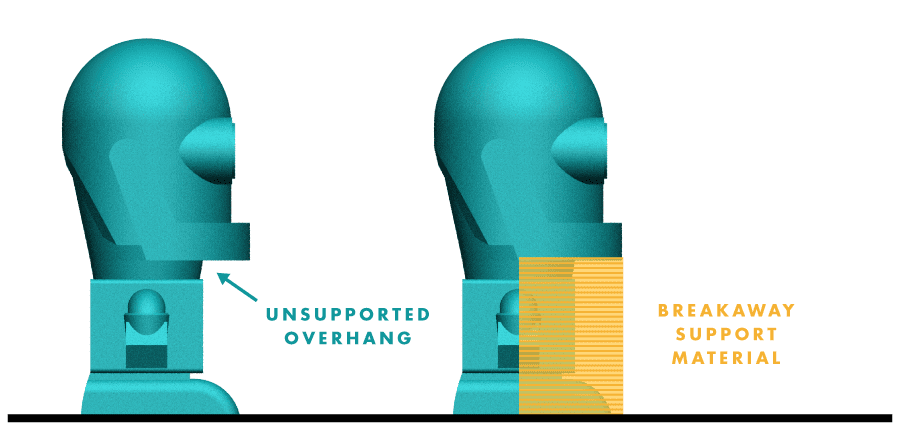 Fig A: Example of when to use support material on an unsupported overhanging feature of a 3D model
On our model shown above, there is an unsupported overhang at the robot’s chin and the Printer will not be able to successfully print this feature. If printed without support material, the robot’s chin would droop and sag, as there is no platform for the material. However, with support material, the chin will be able to print because of the breakaway scaffold.
BRIM
Brim is additional material printed concentrically around your object to help hold down its edges and to prevent warping. In the image we can see an example of brim printed along the base of the object.

RAFT
Raft is removable latticework printed underneath an object to help with warping and bed adhesion. In the image we can see an example of raft printed underneath the base of the object.

BRIM VS RAFT - WHEN TO USE
While both brims and rafts serve the same purpose, there are two things to consider when choosing either: 1) A brim uses less material and prints faster but might not provide enough adhesion for small features. 2) A raft uses more material and prints slower but creates a strong foundation for models with small features.
FLAT SIDE DOWN
The position of an object on the build platform can have a dramatic impact on the end result of the print. Orientation of your print impacts print time, accuracy, and strength of your print. Try to orientate your model so its flat surface is facing down on the build platform.
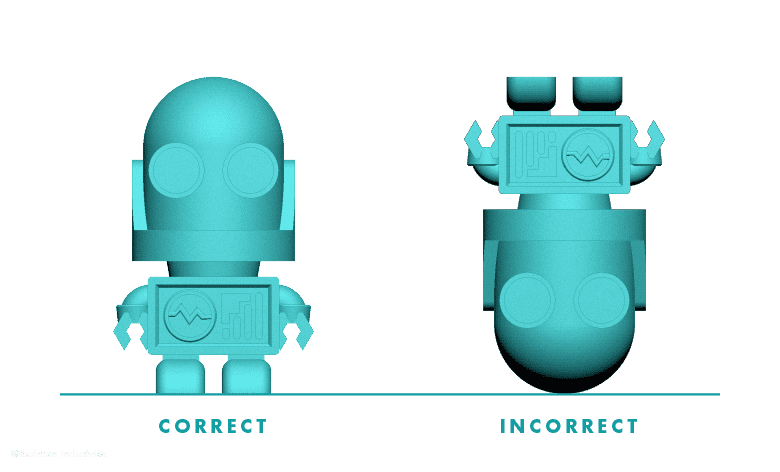 Fig A: Example of how to orient a model for successful 3D printing
STRENGTH vs LAYER ORIENTATION
3D printing is done in horizontal layers, building the object from the bottom up. As a rule of thumb, the fewer number of vertical layers make for a stronger object that will also print faster.
For more detailed instructions on slicing settings, visit Simplify3D® Support Page.
[sc name="Learn Share"]